The Art of the Serve: Squash Serving Techniques for Beginners

A great serve in squash is like a well-scripted opening scene—it sets the tone, steals time from your opponent, and gives you first claim to the T-position. For beginners, mastering a few simple, high-percentage serves (and knowing when to use them) can turn stressful first rallies into controlled, winnable points. This guide breaks down the rules, footwork, core serve types, placement targets, and easy drills so your serve becomes a reliable weapon—not just a formality.

First, know the serve rules (so you don’t give away free points)

  • Foot placement: At least one foot fully inside the service box (not touching the lines) when you strike the ball.
  • Front wall target: Your serve must hit the front wall above the service line.
  • Landing zone: After the front wall, the ball must land in the opposite back quarter (it may touch side/back walls after the front wall and still be good).
  • Alternating boxes: Win a point, switch boxes for the next serve.
  • Faults to avoid: Side wall before front wall, ball below the service line (down), ball out above the out line, or landing in the wrong quarter.

If you’re clean on these, you’ll keep pressure on the receiver from rally one.

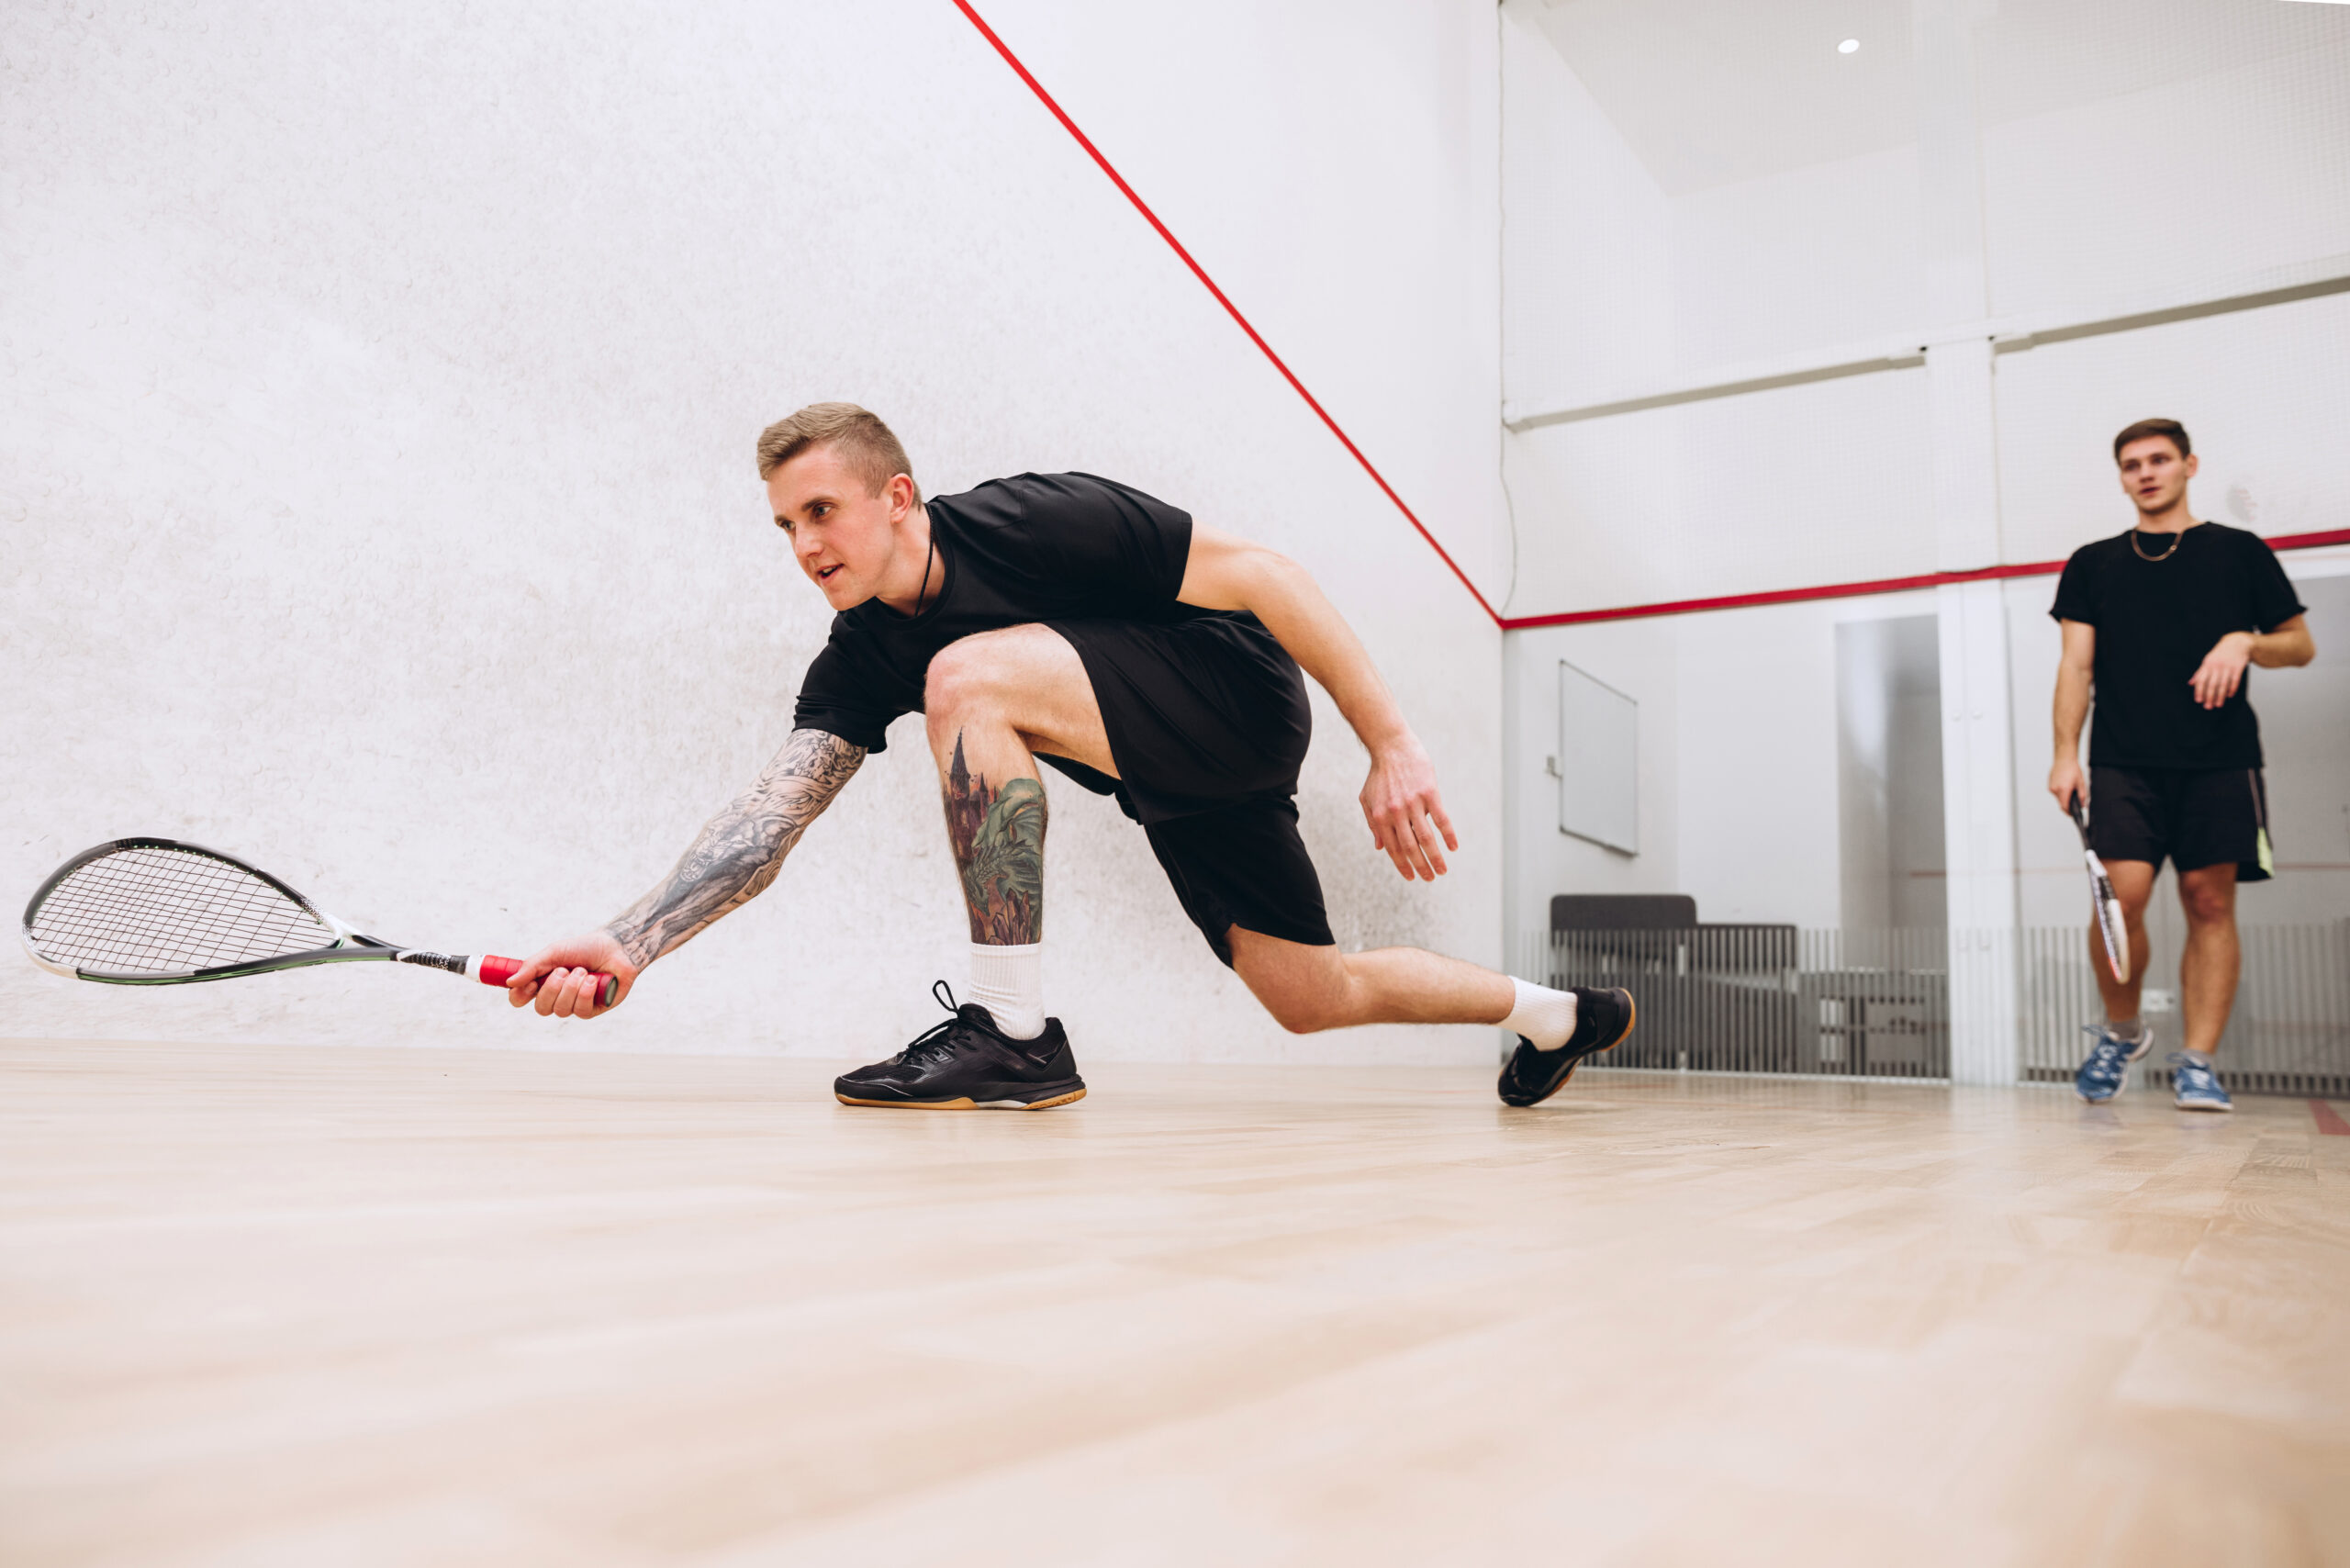
Serve setup: stance, grip, and contact

  • Grip: Neutral “handshake” grip; keep pressure relaxed (4–6/10), tighten briefly at contact.
  • Stance: Shoulders roughly parallel to the side wall; back foot near the rear corner of the service box, front foot pointing slightly toward the front wall target.
  • Ball toss: Think “drop” rather than a high toss—waist-to-chest height so contact is repeatable.
  • Contact point: Slightly in front of your front hip; extend the arm and finish high for height/shape.
  • Hold the pose: A still head and balanced finish improve consistency—and disguise.

The four beginner-friendly serves (with when to use each)

1) The High Lob Serve (bread-and-butter)

What it is: A high, arcing ball that hits the front wall just above the service line and floats deep into the back corner of the opposite side—ideally hugging the side wall after the bounce.

Why it works: It buys you time to recover to the T, forces the receiver to hit under pressure near the glass, and limits their attacking volley.

How to hit it:

  • Aim just above the service line on the front wall.
  • Open the racket face slightly; think “lift,” not “drive.”
  • Visualize a landing point two racquet lengths from the back wall and one racquet width from the side wall.

Common mistake to avoid: Too low (sits up to volley) or too central (easy return). Miss high and wide, not low and middle.

2) The Body Serve (jammer)

What it is: A faster, shoulder-to-hip-height serve that heads toward the receiver’s body on their backhand side (for most players) before bouncing deep.

Why it works: It crowds their swing, forcing a weak, short return you can pounce on.

How to hit it:

  • Aim at the front wall target that projects a line through the receiver’s torso.
  • Keep the trajectory flatter than a lob but not reckless—think controlled pace.
  • Recover to the T quickly; body serves often come back fast.

Use it when: Your opponent is stepping early to volley your lobs or standing too close to the side wall.

3) The Width Serve (side-wall kiss)

What it is: A medium/high serve that clips the side wall shortly after the front-wall hit, then drops steeply into the back quarter.

Why it works: The early side-wall contact changes angle and kills pace, making timing awkward.

How to hit it:

  • From the right box, aim left-of-center on the front wall (mirror from the left box).
  • Visualize a V-shaped path: front wall → near side wall → deep corner.
  • Keep height generous; width without height is a sitter.

Use it when: Opponents like to take the ball early; the side-wall kiss steals their comfort.

4) The Flat Drive Serve (surprise change-up)

What it is: A lower, quicker serve that hits above the service line but travels flatter and lands near the back boundary quickly.

Why it works: As a surprise—not a staple. It rushes the receiver and invites a short, defensive reply.

How to hit it:

  • Contact slightly earlier and drive through the ball.
  • Aim just above the service line; keep it tight to the side wall.
  • Use sparingly; a miss hits the tin or sits up to be punished.

Use it when: You’ve established height with lobs and your opponent is backing off, expecting another one.

Box-by-box tactics: which side favors which serve?

  • From the right box (to left back quarter):
    Most right-handers receive backhand here. Favor high lob and width to pin them; sprinkle in body serves to the hip/racket-hand.
  • From the left box (to right back quarter):
    You’re often serving to their forehand. Use higher, deeper lobs (less jam potential) and the side-wall width to move them late.

General rule: Target the receiver’s weaker wing (usually backhand) more often, but keep mixing height/angle/pace to avoid patterns.

Serve placement: think targets, not just types

Picture each back quarter as a 3×3 grid (front-to-back, wall-to-center):

  1. Back-wall nick zone (deep & wide): Primary lob target.
  2. Shoulder/hip corridor: Body serve lane to jam the swing.
  3. Side-wall kiss lane: Early side-wall contact to distort timing.
  4. Deep central strip: Risky—avoid unless it’s a planned flat drive surprise.

Coaching cue: “Miss wide, miss high.” If you’re going to miss, sail it close to the out line rather than drop it short and central.

The serve + first step: claim the T

Serving is only half the opener; your recovery is the other half.

  • Serve → two fast recovery steps → split step at the T.
  • Racket up, eyes on opponent.
  • If your serve is strong (late/awkward return), look to volley the first reply and keep the opponent behind you.

Bad habit to kill: Watching your serve instead of moving. Hit, move, then read.

Reading the receiver (and adapting mid-match)

  • If they volley early: more height and width; lift the contact point on the front wall.
  • If they stand off the back wall: flatten the trajectory or body-serve into their stance.
  • If they chip short crosscourt: follow your serve into the T and be ready to intercept with a volley straight drive or drop.
  • If they boast frequently, expect it from cramped positions—recover slightly forward after serving to pounce.

Serve patterns should evolve; note what drew the worst return and repeat with variation (same height, different lane; same lane, different pace).

Five simple serve drills (10–12 minutes each)

  1. Lob Ladder
    Aim for front-wall height bands: just above service line → halfway to out line → ¾ height. 10 makes per band from each box.
  2. Deep-Corner Bingo
    Place two cones: one a racquet width from the side wall, one two racquet lengths from the back wall. Score a point for each serve that lands between them and dies near the glass.
  3. Body-Line Accuracy
    Have a partner stand at the typical receiving spot. Chalk a chest-high target on the front wall. Hit through the torso line without over-hitting; 20 reps/box.
  4. Width Kiss Builder
    Mark a rectangle on the side wall about 1.5–2 m behind the short line. Serve so that the ball touches that rectangle after the front wall. 15 clean kisses/side.
  5. Serve + First Volley
    Serve, recover to the T, partner returns anywhere; your only goal is to volley the first return and play length (straight rail). 3 sets × 3 minutes, switch roles.

Final Rally

In squash, you don’t need a dozen fancy serves—you need two or three you trust and the discipline to recover to the T after you hit them. Master a high lob that dies deep, a body serve that jams the backhand, and a width serve that kisses the side wall. Layer in smart placement, crisp footwork, and a first-volley mindset, and you’ll start every rally on your terms.

Serve with purpose, recover with intent, and let your opponent be the one reacting. That’s the art of the serve—and the fastest way for beginners to feel in control from the very first shot.

A Complete Guide to Squash Court Markings and Dimensions

Four walls, a small ball, and countless lines—if you’re new to squash, the court can look more like a puzzle than a playing field.

The first time most beginners step onto a squash court, they notice the maze of red or white lines crisscrossing the floor and walls. It’s not always clear where to stand, how the serve works, or why some balls are “in” and others are “out.” But once you understand the markings and their purpose, the chaos melts into clarity. Those lines aren’t random—they’re the blueprint that keeps squash fast, fair, and tactical.

This guide will walk you through the court layout and markings in squash, explaining what each line means and how it shapes the game. By the end, you’ll not only know where to stand but also how to use the court to your advantage.

1) Dimensions of a Squash Court

A standard singles squash court is:

  • Length: 9.75 meters (32 feet)

  • Width: 6.4 meters (21 feet)

  • Front wall height: 4.57 meters (15 feet)

  • Back wall height: 2.13 meters (7 feet)

Doubles courts are slightly wider (7.62 meters or 25 feet), but the markings are similar.

2) Floor Markings

Service Boxes

  • Two small squares near the front of the court.

  • The server must have one foot fully inside a box during the serve.

  • The ball must then land in the opposite back quarter.

Short Line

  • A line that runs across the court halfway between the front and back walls.

  • It divides the front and back of the court and is essential for serving.

Half-Court Line

  • Runs from the short line to the back wall, splitting the back of the court into left and right service areas.

  • Used to determine which quarter of the court the serve must land in.

3) Wall Markings

Out Line

  • Runs along the very top of the court walls.

  • Any ball that touches above this line is out.

Service Line

  • Horizontal line across the front wall, about halfway up.

  • During a serve, the ball must hit above this line.

Tin

  • The lowest boundary on the front wall, usually a metal strip.

  • If the ball hits the tin, it’s “down,” and the rally ends.

  • Think of it like the “net” in tennis.

4) The T-Position (Unmarked but Crucial)

While not an official marking, the T-position (where the short line and half-court line intersect) is the most important spot on the court. Controlling this central area allows players to reach shots in any direction quickly.

5) How the Markings Shape Play

  • Serving: The service boxes, short line, and half-court line dictate where the server stands and where the ball must land.

  • Rallies: The tin, out line, and front wall keep shots within playable boundaries.

  • Positioning: Players constantly return to the T to cover the court efficiently.

Quick Recap for Beginners

  • Serve with one foot in the service box.

  • The ball must cross the short line and land in the opposite back quarter.

  • Keep shots above the tin and below the out line.

  • Control the T for better positioning.

Final Rally

At first glance, a squash court might look like a confusing patchwork of lines and boundaries. But once you understand what they mean, the markings reveal the sport’s structure: where rallies begin, how points are won, and why positioning matters so much.

The court is more than just a playing surface—it’s a strategic map. The service boxes test your precision, the out lines demand control, and the T-position rewards smart movement. Master the layout, and you’ll not only follow the rules but also start using the court as a weapon in your game.

So next time you step onto the court, don’t just see the lines—play with them, around them, and within them. That’s where the real beauty of squash lies.

Essential Rules of Squash Every Player Should Know

From the moment the ball ricochets off the wall and you scramble to return it, you realize squash isn’t just about speed—it’s about precision, strategy, and respect for the rules that shape the game. For newcomers, though, stepping onto the court can feel confusing. Why so many lines? How does the serve really work? And what happens when you and your opponent collide in the middle of a rally?

That’s where the rules come in. They don’t just keep the game fair; they keep it safe, structured, and thrilling to play. Squash is often described as “chess at high speed,” and like chess, every move matters—but only if you know the framework guiding those moves.

In this guide, we’ll unpack the essential rules of squash every player should know. From court boundaries and scoring to lets, strokes, and simple etiquette, you’ll have everything you need to step on court with confidence and enjoy the game the way it’s meant to be played.

1) The Court and Boundaries

A squash court is a rectangular box, enclosed by four walls and the floor. The walls have markings that act as boundaries:

  • Out line: The topmost line around the court. Any ball above it is out.
  • Service line (front wall only): Used during serves; the ball must hit above this line when served.

  • Tin: The metal strip at the bottom of the front wall. If the ball strikes the tin, the rally ends.

  • Floor markings: The service boxes (small squares near the front) and lines that split the court into left/right and front/back zones.

Learning these lines is the first step to understanding how a rally plays out.

2) How the Serve Works

Every rally begins with a serve, and it has its own rules:

  • The server must have at least one foot fully inside the service box (not touching the lines).

  • The ball must hit the front wall above the service line and land in the opposite back quarter of the court.

  • If the serve hits the side wall before the front wall, it’s a fault.

  • Players alternate service boxes after winning points.

Tip: For beginners, the lob serve—high and deep into the back corner—is the most reliable way to start a rally.

3) Scoring Rules

Squash uses the point-a-rally (PAR) to 11 system:

  • Each rally won earns a point, regardless of who served.

  • Games are played to 11 points, but you must win by at least 2 points (e.g., 12–10, 14–12).

  • Matches are usually best of 3 or best of 5 games.

This scoring keeps matches fast and competitive.

4) How a Rally Works

Once the ball is in play:

  • Players hit the ball alternately.

  • The ball must hit the front wall before bouncing a second time on the floor.

  • It can hit side or back walls before reaching the front wall, as long as it doesn’t go out or strike the tin.

  • Players must clear space after their shot so the opponent has direct access to the ball.

Rallies continue until a player makes a mistake or a winning shot is played.

How to Play Squash: A beginner's guide

5) Let and Stroke Decisions

Since both players share a confined space, interference happens often. That’s where the let and stroke rules apply:

  • Let: A rally is replayed if interference prevents a fair shot, but no clear winner was denied. Example: your swing was blocked slightly but you could have retrieved the ball.

  • Stroke: A point is awarded to you if your opponent blocks your direct path to the ball, preventing a winning or safe return.

  • No let: If the interference is minimal and didn’t affect your ability to play the shot, play continues.

Golden rule: Always move out of the way after your shot. Clearing space is just as important as hitting the ball.

6) Safety Rules

Squash is safe when played with respect, but accidents happen if rules aren’t followed:

  • Never swing if your opponent is too close—call a let instead.

  • Always give your opponent direct access to the ball.

  • Wear protective eyewear in competitive or club play.

Safety ensures longer rallies and better games.

7) Common Faults to Avoid

  • Double bounce: Ball bounces twice before you return it.

  • Down: Ball hits the tin or floor before the front wall.

  • Out: Ball goes above the out line or outside boundaries.

  • Serve fault: Incorrect foot placement or serve landing in the wrong area.

Knowing these will save you from confusion mid-match.

8) Match Etiquette (Unwritten Rules)

Beyond official rules, etiquette keeps the game enjoyable:

  • Start and end with a handshake (or racket tap).

  • Call “let” clearly and fairly.

  • Retrieve balls quickly between points.

  • Wipe sweat patches if the floor gets slippery.

Good etiquette makes you the kind of opponent everyone enjoys playing against.

9) Beginners’ Quick Checklist

  1. Serve with one foot in the box.

  2. Ball must hit the front wall before bouncing twice.

  3. Keep shots above the tin and below the out line.

  4. Recover to the T after each shot.

  5. Always clear space for your opponent.

Final Rally

Squash may look like chaos from the outside—two players darting around a box, balls zipping in every direction—but once you know the rules, the chaos transforms into clarity. Every line, every serve, every call of “let” or “stroke” adds structure to the speed, making the rallies fair, competitive, and exhilarating.

For beginners, the rules are your foundation. They keep you safe, help you understand what’s happening in each rally, and allow you to focus on developing your skills instead of second-guessing the game. Mastering these essentials—court boundaries, serving, scoring, and etiquette—means you can step onto any court in the world and play with confidence.

So the next time you hear the ball crack against the front wall, you won’t just be reacting—you’ll know exactly what to do, where to stand, and how to keep the rally alive. And that’s when squash becomes what it’s truly meant to be: fast, fair, and fiercely fun.

Top 10 mistakes every squash beginner makes

Top 10 Beginner Mistakes in Squash and How to Avoid Them

Squash is fast, intense, and endlessly rewarding—but it can also feel overwhelming when you’re new. Many beginners jump on the court full of energy but quickly find themselves chasing the ball, hitting wildly, or losing points to simple errors. The good news? Most of these struggles come from a few common mistakes that can be fixed with awareness and practice.

Here are the top 10 beginner mistakes in squash—and how you can avoid them.

1) Standing in the Wrong Position

The mistake: Beginners often hang out at the back of the court or drift too close to the front wall, leaving huge gaps for opponents to exploit.

How to avoid it:

  • Always recover to the T-position (the middle where the lines meet).
  • From the T, you can reach any corner quickly.
  • Think: hit → recover → split-step → move.

2) Hitting Too Hard

The mistake: Many beginners swing with maximum power, thinking harder shots equal more points. Instead, the ball often rebounds into the middle, giving opponents easy chances.

How to avoid it:

  • Prioritize accuracy and length over power.
  • Use a smooth swing and aim for tight rails along the wall.
  • Remember: tight, controlled shots win rallies—not reckless power.

3) Ignoring the Side Walls

The mistake: New players avoid using the side walls, trying only to hit directly to the front wall. This makes their game predictable.

How to avoid it:

  • Practice cross-court drives that clip the side wall before reaching the front.
  • Use boasts (side wall → front wall shots) to drag opponents forward.
  • Side walls add variety and disrupt your opponent’s rhythm.

4) Poor Grip Technique

The mistake: Holding the racket like a tennis racquet—flat and tight—limits wrist movement and control.

How to avoid it:

  • Use the handshake grip, placing the “V” of your thumb and index along the racket’s edge.
  • Keep the grip relaxed; tighten only at impact.
  • A proper grip allows cleaner shots and smoother switches between forehand and backhand.

5) Not Clearing After Shots

The mistake: Beginners often admire their shot or freeze after hitting, blocking their opponent’s path. This causes interference and easy point losses.

How to avoid it:

  • After every shot, move back to the T.
  • Clear space quickly so your opponent has access to the ball.
  • If you’re in the way, call for a “let”—but aim to avoid these situations.

Top 7 Squash Courts for You in India

6) Neglecting Footwork

The mistake: Standing flat-footed or lunging late leads to rushed, off-balance shots.

How to avoid it:

  • Stay light on your toes and use a split-step as your opponent strikes.
  • Lunge with your leading leg, keeping your body balanced.
  • Practice “ghosting” drills—moving to corners without the ball—to build muscle memory.

7) Serving Without Purpose

The mistake: Beginners often just tap the ball in to start the rally, giving away the advantage of the serve.

How to avoid it:

  • Use a high lob serve that lands deep in the opposite back corner.
  • Occasionally, mix in body serves to jam your opponent.
  • Treat every serve as a chance to seize control of the rally.

8) Not Watching the Opponent

The mistake: Beginners follow only the ball, ignoring where their opponent is standing. This leads to poor shot choices.

How to avoid it:

  • After hitting, glance at your opponent’s position.
  • If they’re deep, try a drop; if they’re forward, drive it past them.
  • Awareness turns defense into attack.

9) Skipping Warm-Up and Cool-Down

The mistake: Rushing into play cold often results in poor timing—or worse, injuries. Beginners also neglect stretching afterwards.

How to avoid it:

  • Warm up with 5 minutes of solo drives and dynamic stretches.
  • After the game, stretch calves, hamstrings, quads, and shoulders.
  • A small habit that protects your body and improves performance.

10) Fearing the Drop Shot

The mistake: Many beginners avoid drops, thinking they’re too risky, or they play them poorly—too high, too hard, or from bad positions.

How to avoid it:

  • Use drops when you’re balanced and in front of your opponent.
  • Keep the swing compact, guiding the ball softly just above the tin.
  • Mix drops with deep drives to keep opponents guessing.

Bonus Mistake: Not Choosing the Right Ball

Squash balls come in different speeds:

  • Blue dot: Beginner, very bouncy.
  • Single yellow dot: Intermediate, standard club play.
  • Double yellow dot: Advanced, slower.

Using the wrong ball (too slow) makes rallies frustrating and short. Start with blue or single yellow until your rallies are consistent.

Final Rally

Squash is one of the most exciting sports you’ll ever play—but only if you avoid the traps that trip up beginners. Standing in the wrong spot, swinging too hard, ignoring the side walls, or skipping footwork will hold you back. The fix? Keep it simple: recover to the T, control your length, watch your opponent, and stay patient.

Every rally is a lesson, and every mistake is a chance to improve. With the right mindset, you’ll soon find yourself moving smarter, hitting cleaner, and—most importantly—winning more rallies.

So next time you step onto the court, remember: squash isn’t about hitting the hardest shot. It’s about controlling space, anticipating your opponent, and keeping your cool under pressure. Play smart, and the game will reward you.

How to Play Squash: A step-by-step guide for beginners

How to Play Squash: A Step-by-Step Beginner’s Guide

Four walls, one ball, endless action—welcome to squash.

Squash isn’t just a game—it’s a battle of reflexes, strategy, and endurance played inside four walls where the ball never seems to slow down. Ranked among the world’s healthiest sports for its mix of speed, agility, and cardio intensity, squash challenges both your body and your mind. But for newcomers, stepping onto the court can feel overwhelming: What’s with all the lines? How do you serve? And how do you keep up with a ball that seems to vanish into the corners?

This step-by-step beginner’s guide cuts through the confusion. Whether you’re picking up a racket for the first time or looking to turn casual rallies into real games, you’ll learn the basics—rules, equipment, strokes, movement, and strategies—to start playing squash with confidence.

1) Gear You Actually Need (and what to skip)

  • Racket: Start with a mid-weight frame (130–140g unstrung) and an even or slightly head-light balance.
  • Ball: Beginners should use a single yellow dot (or even blue); double-yellow is for advanced play and will feel dead.
  • Shoes: Indoor non-marking court shoes with good lateral support.
  • Eyewear: Mandatory for safety, especially against volleys and ricochets.
  • Overgrip: A tacky grip helps keep control as you sweat.

2) Know the Court and the Lines

  • Service boxes: Where serves begin.
  • Short line: Splits front from back.
  • Half-court line: Splits left from right at the back.
  • Tin: Lower metal strip on the front wall; below it is out.
  • Outline & service line: Ball above these is out.

Core rule: The ball must always hit the front wall before or after the side/back walls and bounce no more than once.

3) How Scoring Works

  • Point-a-rally (PAR) to 11, win by 2.
  • Matches are best of 3 or 5 games.
  • Either player can score—no need to be serving.

4) Serving and Receiving

Serve checklist:

  1. One foot in the service box.
  2. Hit above the service line on the front wall.
  3. Land in the opposite back quarter.
  4. Alternate boxes after winning points.

Receiving tip: Aim to return deep and seize the T-position (center court).

5) Safety, Interference, Let & Stroke

  • Let: Rally replayed if obstructed but not decisive.
  • Stroke: Point to the striker if blocked from a direct winning shot.
  • Golden rule: Always clear space after hitting your shot.

6) The Beginner-Proof Grip

  • Hold it like a handshake.
  • V-shape of thumb/index on the back edge of the racket.
  • Relax your grip; tighten only on contact.

7) Four Core Shots to Learn

  1. Straight Drive (rail): Deep and tight along the side wall.
  2. Crosscourt Drive: Forces opponent off the T.
  3. Drop Shot: Soft, low shot close to the tin.
  4. Boast: Use the side wall to bring the ball forward when stuck.

8) Movement & Footwork

  • Control the T-position.
  • Use a split step as your opponent hits.
  • Lunge smartly and recover quickly.
  • Keep movements short, sharp, and efficient.

9) A Simple Beginner Game Plan

  • Serve high lobs, preferably to the backhand side.
  • Keep shots deep with rails.
  • Volley whenever possible.
  • Use drops sparingly—only when balanced.
  • Boast from defensive positions.

10) Five Starter Drills

  1. Solo straight drives – 100 per side.
  2. Figure-8 volleys – build touch & timing.
  3. Ghosting – shadow footwork to all corners.
  4. Drive–boast routine – partner drill for control.
  5. Serve & return ladder – practice starting rallies.

11) One-Week Beginner Plan

  • Day 1: Rules + solo drives.
  • Day 2: Footwork + drive–boast.
  • Day 3: Short games to 7.
  • Day 4: Rest/mobility.
  • Day 5: Serve & return + conditioned play.
  • Day 6: Full match.
  • Day 7: Light solo practice + stretch.

12) Warm-Up, Cool-Down & Prevention

  • Warm-up (5–8 mins): Skipping, dynamic stretches, light ghosting.
  • Cool-down: Light jog + stretches for calves, quads, hamstrings, and shoulders.
  • Hydrate & refuel with carbs + protein after play.

How to Play Squash: A beginner's guide

14) Court Etiquette Every Player Should Follow

  • Arrive on time with clean shoes.
  • Call “let” clearly and apologize if interfering.
  • Retrieve balls promptly.
  • Wipe sweat patches to prevent slips.

15) Quick FAQs on Squash

1. Is squash hard to learn for beginners?

Not at all. While squash is fast-paced, the rules and basics are simple to pick up. Most beginners can start rallying within their first session. The challenge—and fun—comes from improving your control, movement, and strategy over time.

2. How often should I play squash to improve?

Two sessions per week (one practice, one match) is a solid start. Consistency matters more than volume—regular practice helps you build muscle memory, improve fitness, and develop court awareness without burning out.

3. What’s the difference between squash balls (blue, red, yellow dots)?

  • Blue dot: Fastest, bounciest, ideal for beginners.

  • Red dot: Slightly slower, for improving players.

  • Single yellow dot: Standard club ball, for intermediate players.

  • Double yellow dot: Slowest, for advanced and pro play.
    Choose a livelier ball (blue or red) until you can generate enough pace yourself.

4. Can I play squash if I’ve never played another racket sport?

Yes! Unlike tennis or badminton, squash doesn’t require prior racket experience. The skills—like grip, footwork, and shot-making—are unique, so everyone starts fresh. In fact, complete beginners often learn faster because they don’t carry over habits from other sports.

5. What’s the best way to win points as a beginner?

Focus on three basics:

  1. Serve high and deep (especially to the backhand side).

  2. Hit straight drives tight along the walls.

  3. Always recover to the T after your shot.
    Even without fancy shots, controlling depth and position will win you more rallies than trying to hit risky winners.

Final Rally

Squash may look intimidating at first, but once you understand the court, the rules, and a few key shots, the game quickly turns into an addictive mix of speed, skill, and strategy. Every rally teaches you something new—about timing, positioning, and even how to push through fatigue.

Remember the essentials: serve smart, hit deep, recover to the T, and keep rallies alive with controlled shots. As you practice, the chaos of chasing the ball around four walls transforms into rhythm, flow, and eventually, confidence.

So grab your racket, find a court, and step into the game. Because once you start, you’ll understand why squash has been called “the sport for life”—fast, social, endlessly challenging, and always worth that final sprint to the ball.

The Curious Case of Asia Cup trophy: Why Team India was denied the trophy

The heart of the controversy was the presence of the Asian Cricket Council (ACC) president, Mohsin Naqvi, to present the awards. Naqvi, who holds the dual role of PCB Chairman and Pakistan’s Interior Minister, was deemed an unacceptable figure by the Indian team management. India’s objection stemmed from Naqvi’s alleged anti-India stance and a series of provocative social media posts and actions throughout the tournament, including demanding that the ICC charge Indian captain Suryakumar Yadav for expressing solidarity with the Indian Army.

Indian team officials reportedly informed the ACC well in advance that the players would refuse to accept the silverware from Naqvi. Their stance was firm: while they were willing to receive the trophy from any other dignitary on the dais—such as the Emirates Cricket Board vice-chairman—they would not engage with Naqvi.

The Aftermath

The presentation ceremony was delayed for nearly an hour as ACC officials scrambled to resolve the deadlock. Naqvi, however, stood his ground, insisting on presenting the trophy in his capacity as ACC chief and reportedly blocking any attempt to find an alternative presenter. The tension was palpable on the field as the Indian players stood firm at a distance from the podium, while Naqvi waited awkwardly on stage.

The atmosphere was further charged by the crowd. Indian supporters inside the stadium booed loudly when Naqvi appeared and filled the air with chants of “Bharat Mata Ki Jai.” The Pakistani team added to the confusion by remaining inside their dressing room for a prolonged period after the match ended.

When it became clear that India would not budge, the ceremony proceeded to individual awards, which were presented by other officials. However, the final act of the evening sent shockwaves through the cricketing world. Instead of the trophy being given to the winning captain, Mohsin Naqvi, along with the ACC event staff, allegedly walked away with the Asia Cup trophy and the winners’ medals.

This unprecedented denial of the trophy to the champion team sparked immediate and furious condemnation. Here’s how the BCCI, Team India skipper Suryakumar Yadav and Mohsin Naqvi reacted to the entire controversy.

  • BCCI’s Strong Protest: BCCI Secretary Devajit Saikia slammed the act as “very unfortunate, very unsporting,” and “childish.” He announced that the BCCI would lodge a “very serious and very strong protest” against Naqvi’s conduct at the International Cricket Council (ICC) conference in November. Saikia justified the team’s refusal, stating they could not accept the trophy from a person who “represents a country that is waging a war against our country.”
  • Player Reactions: Indian captain Suryakumar Yadav publicly criticized the organisers, stating he had “never seen a champion team being denied a trophy, that too a hard-earned one.” The victorious team, in a show of defiance, celebrated on the podium without the physical trophy, with players later posting images with a mock or virtual trophy on social media.
  • Naqvi’s Response: Adding fuel to the fire, Naqvi posted a controversial response on social media to the Indian Prime Minister’s congratulatory message, attempting to drag political conflict into the sporting victory, which was heavily criticized by cricket analysts for politicizing the game.

The Asia Cup final of 2025 will forever be etched in memory as the day geopolitical friction completely overshadowed sporting achievement, culminating in the embarrassing spectacle of a trophy being whisked away from the rightful champions.

How To Use Walls in Padel

How to Use the Walls in Padel: Beginner to Advanced Tactics

When most beginners step onto a padel court for the first time, the walls feel like enemies. A ball ricochets off the glass, and instinct tells you to swing too early—or not at all. You miss, feel rushed, and wonder how the pros make it look effortless. But here’s the truth: the walls are not obstacles—they’re allies.

Padel legend Fernando Belasteguín often says that what separates good players from great ones is not just technique at the net, but how confidently they use the glass under pressure. Unlike tennis, where one bounce means the end of the rally, padel gives you a second chance through the back and side walls. That extra rebound is what turns defense into offense, resets rallies, and frustrates opponents who expect an easy winner.

Think about it:

  • A ball that looks unreturnable suddenly comes alive after the back wall.
  • A slow chiquita (soft ball) played after a rebound can force even the strongest volleyer to cough up an easy ball.
  • And advanced players use the glass to build smashes that either bounce twice on the court or fly out over the side wall entirely.

From beginners learning the “salida de pared” to advanced players mastering the bajada or por tres, wall play is the backbone of modern padel. If you want to climb levels, you must learn not just to survive the glass, but to exploit it.

In this guide, we’ll move step by step—beginner to advanced tactics—so you can transform the walls from intimidating barriers into your most reliable partner on court.

The non-negotiable basics (rules & surfaces)

  • Glass = legal; mesh = not for returns. During rallies, shots are valid off your back/side glass after the bounce. The mesh/fence is different—if the ball hits the mesh first, it’s a fault. On serves, the ball may touch the glass after landing in the correct service box, but never the mesh.
  • Uniform, predictable rebound. Regulation courts use glass/solid wall materials that must give a regular bounce; learning that bounce is step one to reading the wall.

PART 1 — Beginner: make the wall your safety net

1) The Salida de Pared (off-the-back-wall drive)

Your bread-and-butter when a deep ball pins you at the baseline. Let the ball pass, rebound off your back glass, step forward into contact, and push a controlled drive cross-court or middle. It buys time, centers you, and stops rushed mishits off the first bounce.

Keys

  • Give yourself space from the wall—don’t hit jammed.
  • Meet the ball slightly in front of your body after the rebound.
  • Aim deep middle to avoid side-glass giveaways.

2) The Double Glass (doble pared) in the corner

When a ball clips back-then-side wall (or vice-versa), many beginners panic, stay patient: open the racket face, turn your shoulders, and let the ball complete its path before stepping into a compact swing.

Keys

  • Watch the first rebound to predict the second.
  • Small backswing; finish balanced.
  • Play higher over the net until your feel improves.

3) The Chiquita (soft ball to the feet) after a wall

Once you’re controlling off-the-glass drives, add the chiquita: a gentle, low ball to the volleyer’s shoelaces. Hit it after a comfortable rebound to force a pop-up and let your team advance.

Drill: Coach feeds deep; you play salida de pared → chiquita to feet, then take two steps forward together.

PART 2 — Intermediate: turn defense into pressure

4) The Bajada de Pared (off-the-wall attack)

When a lob or drive pushes you back, you can attack off the wall by waiting for the rebound and hitting down through the ball into the opponent’s feet or open middle.

Keys

  • Contact slightly later than a normal drive, body weight moving forward.
  • Targets: volleyer’s feet, body, or the gap between players.

5) Side-glass angles that break patterns

From the backhand corner, a controlled drive that clips your side glass before crossing the net can create wicked angles and pull opponents off the middle.

6) The Reset Lob vs. the Attacking Lob

After a good salida, lift a reset lob high and deep to reclaim time and force rivals off the net. When their contact is low or they’re crowded, throw an attacking lob that lands short-deep to the corner to provoke a bad glass read, then advance.

7) Defending the Corner Trap

Good opponents will hammer the seam where the back- and side-glass meet. Read the height of the first bounce:

  • Low, skidding → get behind it and use the wall; drive higher cross-court.
  • Medium → favor double-glass with compact swing.
  • High → step in and take it before the wall to change pace.

PART 3 — Advanced: walls as weapons

8) The Víbora & Bandeja to keep the net

Advanced pairs win by keeping the net. Your overheads after lobs—bandeja (controlled, slicing overhead) and víbora (faster, wristier sidespin)—aim deep into corners/side-glass to rebound low and stop rivals from counter-attacking off their own wall.

Pattern: Bandeja deep → read their wall exit → close the middle and volley to feet.

9) The Por Tres (kick smash out over side wall)

When a lob sits up and you’re balanced, a topspin smash that kicks high after the bounce and leaves over the 3-meter side-wall ends the point—or lets you finish outside the court.

Keys

  • Timing > brute force.
  • Brush up the back, contact slightly behind the top of the ball.
  • Aim for the glass-to-fence seam.

10) Your Glass as a Set-Up Tool (Contrapared)

Under pressure, use your own back glass deliberately to bend the rally back in your favour: bump a soft ball into your glass to change pace, or throw a high, slow arc off your glass to reset formation.

11) Doble Pared Que Cierra (two-wall “closing” shot)

A purposeful two-glass pattern (back, then side) that “closes” angles on the opponent by making the ball die near the fence. Use this when the middle is crowded but the corner is exposed.

Positioning & footwork: a mini-framework

At the back

  • Stand one step behind the service line, weight forward, racket up.
  • When deep balls land on/behind the line, let them hit the glass—don’t fight the first bounce.
  • After a salida or chiquita, move as a pair—either both hold or both advance.

At the net

  • Expect lobs; turn early for bandeja/víbora.
  • After your overhead, recover two short steps to re-close the middle.

In the corner

  • Hips/shoulders side-on; small split-steps to buy time.
  • Compact swing for double-glass; avoid big backswings that collide with the side wall.

Progressive Drills (Solo & With a Partner)

1. Solo Wall Feel (10 minutes daily)

  • Stand a racket length away from the back glass.
  • Drop-feed, let it bounce and rebound, then step forward and drive it cross-court.
  • Do 20 forehands + 20 backhands.
  • Progression: Add targets (cones/zones) to train accuracy.

2. Corner Ladder Drill (Partner Feed)

  • Partner feeds balls to the backside seam.
  • Sequence: (1) single glass, (2) double glass, (3) take before the wall.
  • Repeat 5 reps each.
  • Key: Short swings, compact control.

3. Salida → Chiquita → Close Drill

  • From baseline, hit a salida de pared.
  • Follow with a chiquita to the opponent’s feet.
  • Both players step forward together to close the net.
  • Volleyers respond with a lift → defenders win the net.

4. Bandeja / Víbora Sequences

  • Partner lobs alternately to corners.
  • Hit bandeja (deep slice) or víbora (fast sidespin).
  • After each, recover two steps back to close middle.
  • Pro-level target: Deep corner bounce that dies low.

5. Bajada Targets Drill

  • Partner feeds deep lob into the corner.
  • Play bajada (downward attack) after rebound.
  • Aim for: feet, body, or middle gap.
  • 10 reps each.
  • Key: Let the ball rise slightly post-rebound before striking.

6. Por Tres Build-Up Drill

  • Start inside service line: hit topspin smash, aiming for height + spin.
  • Step back gradually until baseline.
  • Advance to hitting toward the side glass seam for controlled exits.
  • Tip: Focus on brushing up the ball, not just power.

Common Mistakes (And How to Fix Them)

1. Standing Too Close to the Glass

  • Mistake: Crowding the wall, no room for rebound.
  • Fix: Stand 1–1.5m away to step forward into contact.

2. Rushing the Swing

  • Mistake: Hitting before the rebound completes.
  • Fix: Wait for the ball to come forward; use a compact stroke.

3. Over-Swinging on Double Glass

  • Mistake: Forcing winners from tricky rebounds.
  • Fix: Play with margin, lift over net, reset rally.

4. Poor Footwork / Reaching

  • Mistake: Leaning instead of moving feet.
  • Fix: Split-step before bounce; use sidesteps to adjust.

5. Panicking Against Lobs

  • Mistake: Wild smashes → errors or counters.
  • Fix: Develop the bandeja—controlled, deep placement.

6. Misusing the Mesh/Fence

  • Mistake: Treating mesh like glass.
  • Fix: Remember: glass is playable, mesh isn’t (especially on serve).

7. Playing Too Short in Defense

  • Mistake: Wall exits land mid-court, inviting attack.
  • Fix: Focus on depth beyond the service line with salida/chiquita.

8. Forgetting Team Movement

  • Mistake: One player advances, partner stays back.
  • Fix: Always move as a pair—either both defend or both close the net.

Conclusion – From Fear to Flow: Making the Walls Your Ally

Every padel player remembers the first time the ball came flying off the glass—it felt chaotic, unpredictable, even a little unfair. But as you’ve seen, the walls are not meant to confuse you; they’re designed to add depth, creativity, and strategy to the game.

For beginners, learning the salida de pared turns panic into calm. For intermediates, tools like the bajada and the reset lob change defense into attack. And for advanced players, smashes like the víbora and por tres prove that the glass isn’t just for survival—it’s for domination.

The key is patience. Don’t rush the rebound. Give yourself space, trust the wall, and let the game slow down. Once you embrace that rhythm, you’ll stop dreading the glass and start using it to control rallies, outsmart opponents, and dictate the pace of play.

Padel’s magic lies in these walls. They turn every rally into a puzzle of timing, angles, and tactics. Master them, and you’ll unlock the essence of what makes padel not just another racket sport, but one of the fastest-growing games in the world.

So next time the ball hits the back wall, don’t panic—smile. That’s your cue to play padel the way it’s meant to be played.

Round vs Teardrop vs Diamond: Which racquet suits your style?

Round vs Teardrop vs Diamond Rackets: Which One Suits Your Style?

Padel may look simple—ball, court, and racket—but anyone who has stepped onto the court knows that equipment can make or break your game. Unlike tennis, padel rackets come in distinct shapes that dramatically affect performance. The three main types—round, teardrop, and diamond—are more than just cosmetic differences. Each shape influences your control, power, sweet spot, and overall playing style.

Whether you’re a beginner looking for forgiveness, an intermediate player chasing balance, or an advanced hitter hungry for power, understanding racket shapes is the first step toward finding your perfect match.

1. Round Rackets – Built for Control

Key Features

  • Sweet Spot: Large and centered.
  • Balance: Low (towards the handle).
  • Power vs Control: Prioritizes control over raw power.
  • Weight Distribution: Even, forgiving on mishits.

Who Should Use It?

Round rackets are the go-to choice for beginners or defensive-style players. With a big sweet spot and low balance, they reduce the number of errors and make it easier to return balls consistently.

If you’re new to padel, a round racket helps you build confidence by giving you more time to react and minimizing mistakes.

Pros

  • Large sweet spot makes shots forgiving.
  • Easier to maneuver, great for rallies.
  • Reduces strain on the wrist and elbow.

Cons

  • Limited power for smashes and aggressive shots.
  • May feel too “safe” for advanced players.

Popular Models (2025)

2. Teardrop Rackets – The All-Rounder

Key Features

  • Sweet Spot: Mid-to-high, slightly smaller than round.
  • Balance: Medium.
  • Power vs Control: Balanced mix of both.
  • Weight Distribution: Hybrid between control and attack.

Who Should Use It?

The teardrop racket is the Swiss army knife of padel gear. It’s best for intermediate players who want both control in defense and enough punch to attack when opportunities arise.

If you’ve played for a while and want a racket that grows with you, teardrop is the most versatile shape.

Pros

  • Balanced performance for both power and control.
  • More versatility than round rackets.
  • Great for all-court players who switch between offense and defense.

Cons

  • Doesn’t excel as much in control as round rackets or in power as diamond rackets.
  • Requires more precision than round shapes.

Popular Models (2025)

3. Diamond Rackets – The Powerhouses

Key Features

  • Sweet Spot: Small, located at the top.
  • Balance: High (towards the head).
  • Power vs Control: Maximizes power at the expense of forgiveness.
  • Weight Distribution: Head-heavy, built for aggressive shots.

Who Should Use It?

Diamond rackets are made for advanced and attacking players who thrive on smashes, volleys, and finishing points quickly. If you’re confident in your technique and have the strength to control a head-heavy racket, the diamond shape will reward you with explosive power.

Pros

  • Unmatched power for smashes and offensive play.
  • Ideal for aggressive strategies.
  • Provides professional-level performance.

Cons

  • Small sweet spot punishes mishits.
  • Less maneuverable, harder for beginners.
  • Can cause fatigue during long games.

Popular Models (2025)

4. Side-by-Side Comparison

Feature Round Rackets Teardrop Rackets Diamond Rackets
Sweet Spot Large & centered Mid-high, medium size Small, at top
Balance Low (handle-heavy) Medium High (head-heavy)
Best For Control, defense, beginners Balanced all-round play Power, attack, advanced
Forgiveness High Medium Low
Power Low Medium High
Control High Medium Low

5. How to Choose the Right Shape for Your Style

Your ideal racket shape depends on your level, goals, and playing style:

  • Beginner / Defensive Player → Go for Round. You’ll enjoy more rallies and fewer errors.
  • Intermediate / Balanced Player → Choose Teardrop. It adapts to both control and power.
  • Advanced / Aggressive Player → Pick Diamond. Perfect for finishing points with smashes.

Pro Tip: Don’t just follow trends. Test rackets if possible—feel, weight, and grip size also play a huge role alongside shape.

6. Additional Factors Beyond Shape

While shape is key, also consider:

  • Weight: Light rackets (340–360g) for quick reactions, heavy rackets (370g+) for stability.
  • Core Hardness: Softer cores for control and comfort, harder cores for power.
  • Grip Size: Affects maneuverability and wrist comfort.
  • Material: Carbon fiber for durability and power; fiberglass for comfort and affordability.

Conclusion – Find Your Perfect Fit

Choosing between round, teardrop, and diamond padel rackets isn’t just about shape—it’s about how you want to play the game.

  • If you’re starting out, the round racket will guide you safely into padel.
  • If you want an adaptable tool, the teardrop racket is your best bet.
  • And if you’re a power-hungry smasher, the diamond racket will become your weapon of choice.

Remember, no racket is inherently better—it’s about matching your style and skill level. With the right choice, your racket won’t just be equipment; it’ll be an extension of your game.

Best Padel Rackets for Beginners in 2025 [Complete Buying Guide]

Padel is no longer a niche pastime—it’s one of the fastest-growing sports in the world, with more than 50,000 courts globally. Its mix of tennis, squash, and social play makes it addictive, but for beginners, the right gear is crucial. The most important piece of equipment you’ll buy is your first racket. A beginner-friendly racket can make rallies easier, reduce arm strain, and speed up learning, while the wrong one can lead to frustration and poor technique.

In this guide, we’ve compiled the Top 10 beginner-level padel rackets to buy in 2025, along with practical advice on what to look for before purchasing. Whether you’re playing your first social match or signing up for regular training, this article will help you find the perfect starting racket.

Top 10 Beginner-Level Padel Rackets to Buy in 2025

1. HEAD Evo Speed 2025 Padel Racquet

  • Why it’s great: Lightweight, forgiving, and designed with comfort foam, it provides “easy power” and quick handling.
  • Best for: Absolute beginners who want a soft, arm-friendly feel.
  • Price range: ₹8,000–₹9,000).
  • Buy Now

2. Babolat Contact Padel Racquet

Babolat Contact Padel Racquet

  • Why it’s great: Extremely maneuverable with a large sweet spot, this racket is designed for beginners who want confidence from the first hit.

  • Best for: Casual players and those just entering the sport.

  • Price range: ~₹6,000–₹8,000.

  • Buy Now

3. Babolat Air Vertuo 2025 Padel Racquet

  • Why it’s great: Lightweight with a hybrid round/teardrop shape, offering easy maneuverability plus a little extra “pop.”
  • Best for: Players who want comfort but don’t want to sacrifice all power.
  • Price range: ~₹12,000–₹14,000.
  • Buy Now

4. Babolat Storm Padel Racquet

Babolat Storm Padel Racquet

  • Why it’s great: Slightly more advanced than the Contact, the Storm adds a bit of power while retaining comfort and control.

  • Best for: Beginners ready to improve and progress quickly.

  • Price range: ~₹8,000–₹10,000.

  • Buy Now

5. HEAD Flash Pro 2023 Padel Racquet

  • Why it’s great: A step up in stability compared to basic entry rackets, yet still beginner-friendly with a forgiving core.

  • Best for: Beginners who plan to play regularly and want durability.

  • Price range: ~₹8,000–₹10,000.

  • Buy Now

6. HEAD Bolt 2025 Padel Racquet

  • Why it’s great: Designed with lightweight materials and a big sweet spot, the Bolt is all about control and comfort.

  • Best for: New players who want an easy-to-swing racket with dependable consistency.

  • Price range: ~₹9,000–₹10,000.

  • Buy Now

7. SIUX Beat Hybrid Air 2 Padel Racquet

SIUX Hybrid Air 2 Padel Racquet

  • Why it’s great: Blends a hybrid shape with soft materials, offering beginners a mix of forgiveness and gradual power.

  • Best for: New players who want a racket that grows with their skills.

  • Price range: ~₹7,000–₹9,000.

  • Buy Now

8. Adidas Match Light 3.3

  • Why it’s great: One of Adidas’s lightest rackets, round shape, and soft materials. Perfect for players worried about arm fatigue.
  • Best for: Beginners prone to wrist or elbow strain.
  • Price range: ~₹7,000–₹9,000.
  • Buy Now

9. NOX AT Genius Ultralight Padel Racquet

  • Why it’s great: Very lightweight with excellent control features; perfect for juniors, smaller players, or anyone worried about arm strain.

  • Best for: Beginners who want ultimate maneuverability without losing stability.

  • Price range: ~₹9,000–₹11,000.

  • Buy Now

10. Babolat Reveal Padel Racquet

Babolat Reveal Padel Racquet

  • Why it’s great: The Babolat Reveal offers a smooth entry into the sport with specs tailored to comfort—expected round or soft-hybrid face, forgiving rebound, and manageable weight. Even though it’s a newer model, its build suggests it will follow Babolat’s values of playability and beginner-friendly performance.

  • Best for: Beginners who want a trusted brand, balanced features (control + some pop), and something that still feels good when rallies get longer.

  • Price range: ~ ₹7,000–₹9,000.

  • Buy Now

What Should You Keep in Mind While Selecting a Padel Racket?

Buying your first padel racket is more than just picking a brand name. Here are the specs that matter most for beginners:

1. Shape

  • Round → Best for beginners. Large sweet spot, forgiving on mishits.
  • Teardrop → Balanced option for players progressing quickly.
  • Diamond → Power-oriented, less forgiving—avoid until advanced.

2. Weight

  • Light (340–360 g): Easy to maneuver, arm-friendly.
  • Medium (360–370 g): Balanced, good once you have a consistent technique.
  • Heavy (370+ g): Powerful but hard to control—skip as a beginner.

3. Balance

  • Low balance: Easier to swing, ideal for new players.
  • High balance: Generates power but strains wrists. Stick to low or even balance initially.

4. Core Material

  • Soft EVA/Foam: Absorbs impact, expands sweet spot, beginner-friendly.
  • Hard EVA/Carbon Mix: Power-focused, better for advanced players.

5. Surface Material

  • Fiberglass: Softer, flexible, and more forgiving → perfect for starters.
  • Carbon Fiber: Stiffer, more powerful, but requires better technique.

6. Grip Size & Comfort

Your racket should feel comfortable in your hand. Add an overgrip if it feels slippery or too small. Comfort = confidence.

7. Price Range

Don’t overspend on your first racket. Beginners do best in the ₹4,000–₹12,000 range. Invest more once you play regularly and refine your style.

Conclusion

Padel is about enjoyment, community, and gradual skill-building. Choosing the right beginner racket will make your first rallies smoother, help you master wall rebounds, and reduce injury risk.

If you’re just starting out, round-shaped, lightweight, fiberglass rackets with soft EVA cores are your safest bet. Options like the HEAD Evo Speed 2025, Adidas Drive 3.4, and NOX X-One Evo deliver exactly what beginners need: forgiveness, comfort, and control.

Remember: your first racket isn’t about power or status—it’s about learning the sport with the right partner in hand. Start simple, play often, and as your technique improves, you can upgrade to rackets that add power and spin. And if you are looking for the best padel rackets in an affordable budget, visit God of Sports and get the best padel gear at an unbelievable price.

Essential Padel Terminology – 25 Words Every Player Must Know

Padel isn’t just a sport—it’s a phenomenon that has grown from a quirky backyard invention into one of the world’s fastest-growing games. The story begins in 1969, when Mexican businessman Enrique Corcuera built a walled court at his home in Acapulco. He wanted a game that blended tennis, squash, and social play. What started as a creative experiment quickly spread to Spain and Argentina, where padel exploded in popularity. Today, with over 50,000 courts worldwide, it’s played everywhere from Europe to the Middle East to India.

But to truly play padel, you need to speak its language. Step onto a court and you’ll hear words like bandeja, víbora, chiquita, and por tres. At first, it may sound like code, but these terms capture the unique tactics and artistry that make padel different from tennis or pickleball.

This guide will walk you through 25 essential padel terms every player must know—so you can not only follow the game but play it with confidence and flair.

A) Overheads & Finishing Shots

  1. Bandeja
    The signature padel overhead: a controlled, sliced “defensive smash” you play against lobs to keep the net. Contact is high but relaxed; aim deep to corners so the ball stays low after the glass.

  2. Víbora (Viper)
    Looks like a bandeja but faster with more side-spin and a later, wristier contact. Used to pressure feet or side glass and create ugly rebounds—an attacking cousin of the bandeja.

  3. Remate (Smash)
    The power overhead to finish points. In padel, you choose flat, topspin (kick), or even angle into glass—always considering court position and wall rebounds.

  4. Kick Smash
    A topspin smash that kicks violently after the bounce. Done right, it can jump back to your side or set up an “out of court” finish.

  5. Por Tres / X3
    A smash that leaves the court over the 3-meter side wall (often after the back glass). The classic crowd-pleaser.

  6. Por Cuatro / X4
    A flat, close-to-net smash that exits over the 4-meter back glass. Think “drill it down, send it out.”

  7. Gancho (Hook)
    High contact overhead (often when the lob floats over your shoulder). Compact swing, direct line—great to hold the net without giving time to opponents.

B) Soft-Touch & Setup Shots

  1. Chiquita
    The little one: a soft, low ball from the back aimed at the volleyer’s feet to force a weak lift and let you move in. It’s a momentum shifter.

  2. Dejada (Drop Shot)
    A gentle touch that dies short, best used when rivals are deep or leaning back. Use sparingly: disguise matters.

  3. Globo (Lob)
    Padel’s safety valve. High and deep to reset, buy time, and take the net on the next ball. It’s the shot most beginners underuse.

C) Walls & Rebounds (Your Best Friend)

  1. Salida de Pared (Wall Exit)
    Your bread-and-butter rebound after the back or side glass. Let the ball come off the wall, step forward, and strike from a comfortable height.

  2. Bajada de Pared (Wall Descent)
    An attacking wall shot: let the ball drop off the glass and drive it low and hard through the middle or to feet—often used to counter a smash.

  3. Doble Pared (Double Wall)
    Playing the ball after two glasses (side+back or back+side). It buys time, changes angles, and is a key defensive skill under pressure.

  4. Contrapared (Against-the-Wall Boast)
    Intentionally using your own back glass to send the ball back over the net—especially when the ball is already behind you.

D) Volleys, Grips & Formations

  1. Block Volley (Bloqueo)
    Minimal swing, firm face, absorb pace. The go-to answer when rivals fire from the back—reset the rally and hold your ground at the net.

  2. Continental Grip
    The universal padel grip (like holding a hammer). It lets you volley, bandeja, and smash without grip changes—a non-negotiable habit for consistency.

  3. Australian Formation
    Server and partner start on the same side to keep preferred forehand/backhand matchups. Popular among pros; requires a quick first step after serve.

  4. The Fridge (Nevera)
    Tactic of freezing one player by sending almost every ball to their partner. Emotionally tough, tactically effective—agree ground rules in friendlies!

E) Scoring & Match Terms

  1. Deuce (40–40)
    Tie at 40. Traditionally, you must win two in a row (advantage, then game).

  2. Advantage
    The point after deuce. Lose it and you’re back to deuce; win it and you take the game.

  3. Golden Point (Punto de Oro)
    Used in many events: at 40–40, one point decides the game; the receivers choose which side to take the return. Popularised by the World Padel Tour in 2020.

  4. Tiebreak
    At 6–6 in games, play a breaker to 7 points, win by 2; then record the set as 7–6.

  5. Let (on Serve)
    Serve touches the net and lands correctly—replay the serve.

  6. Double Fault
    Miss both serve into the box—point to receivers. (Also watch foot faults.)

  7. Foot Fault
    Stepping on/over the line before contact on serve—counts as a fault.

Quick Usage Guide (90-second refresher)

  • Holding the net? Expect lobs; answer with bandeja, víbora, or gancho to keep pressure.

  • Pinned deep? Use salida de pared to reset, chiquita to their feet to take the net, or globo to recover.

  • Finishing a sitter? Choose kick smash (jumping bounce) or go big with por tres/por cuatro when the setup is perfect.

  • Under attack at the net? Stay compact with a block volley—absorb pace, aim deep middle, and re-establish formation.

  • Serving plan? Try the Australian formation to protect strengths; just be ready for the first ball.

How to Learn These Fast (Mini-Drills)

  • Wall warm-up: 10 × salida de pared on each side; focus on footwork and contact height.

  • Soft-touch ladder: Alternate chiquita → volley block exchanges with partners at half pace, aiming at feet.

  • Overhead circuit: 5 bandejas to deep corner → 3 víboras to feet → 2 controlled smashes. (Quality of placement > power.)

Final Word – From 1969 to Today

When Enrique Corcuera set up the first walled court in Acapulco back in 1969, he probably didn’t imagine millions of people would one day be shouting bandeja or por tres on glass courts across the globe. Yet that’s exactly what happened. Padel has grown from a backyard idea into a global movement—and with it, its own rich vocabulary.

Learning these 25 essential terms isn’t just about sounding like a pro. It’s about understanding the culture and strategy of the game. Every time you play a globo, set up a chiquita, or finish with a víbora, you’re connecting with decades of padel evolution.

So the next time you step onto court, remember: you’re not just hitting a ball—you’re carrying forward the language, history, and spirit of a sport that has united communities around the world.

Home
Shop
Wishlist0
Back to Top

Search For Products

Product has been added to your cart
Compare (0)