Why Squash is the Perfect Sport for Busy Professionals

It’s 7:30 a.m. and your calendar already looks like a battlefield—client calls, project deadlines, a team catch-up, and maybe even a late-night dinner meeting. By the time you’re done, the last thing you want to think about is squeezing in a two-hour workout or dragging yourself to a crowded gym. For many busy professionals, fitness often becomes the first casualty of a hectic schedule.

But imagine a sport where 45 minutes is all it takes to get a full-body workout, sharpen your focus, and even build valuable professional connections. A sport that demands your attention so completely that, for a brief window, stress and emails simply don’t exist. That’s squash.

Unlike many other activities, squash seems designed with the professional lifestyle in mind. It’s compact, efficient, and brutally effective. A single game will leave you drenched, energized, and mentally reset—without requiring a half-day commitment. Better still, squash clubs often double as networking hubs, where the post-match handshake can be just as rewarding as the workout itself.

For professionals who juggle endless responsibilities, squash isn’t just a sport—it’s a strategic investment in health, performance, and balance. In the sections that follow, we’ll unpack why squash is uniquely suited to busy people: how it delivers fitness fast, clears mental clutter, strengthens social and professional ties, and fits seamlessly into even the most demanding schedule.

1) Serious fitness in 45 minutes (or less)

Squash is naturally interval-based: short sprints, sudden stops, quick recoveries, repeated dozens of times. That maps perfectly to HIIT (high-intensity interval training), which is proven to deliver large aerobic and anaerobic gains in less time than steady cardio. A single game can spike your heart rate, challenge your legs and core, and train your agility and balance—all while you’re having fun.

Time math:

  • 5–8 minutes dynamic warm-up
  • 25–30 minutes of games or structured drills
  • 5 minutes cool-down and stretch

That’s a complete training session inside a lunch break, with enough intensity to move the needle on fitness.

2) Built-in stress relief and mental reset

Squash demands full attention. You can’t ruminate on emails when a ball is ricocheting at odd angles. The sport becomes a moving meditation: footwork, split-step, swing, recover. Ten minutes in, your nervous system has switched gears from cognitive overload to present-moment focus. The payoff after work? Lower stress, clearer headspace, and better sleep.

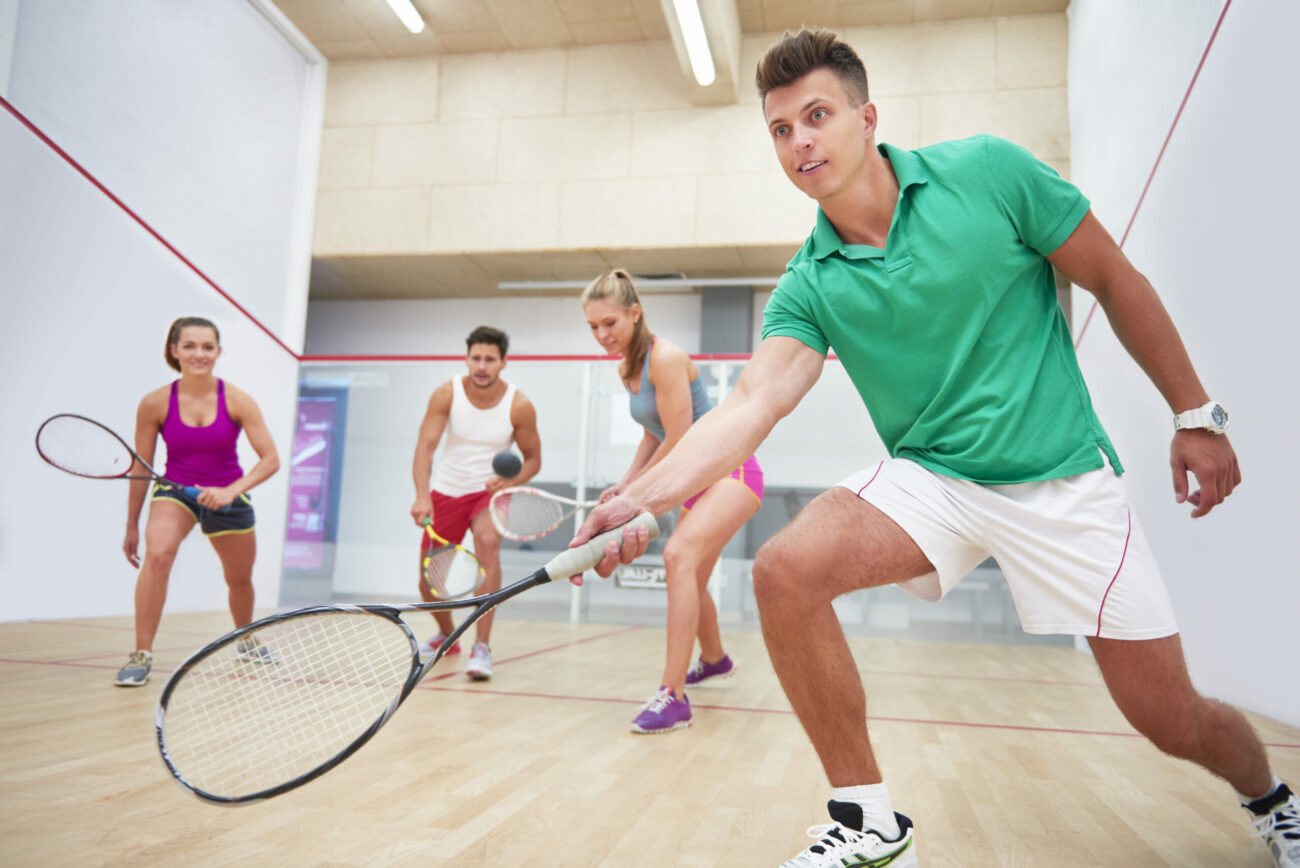
3) The best networking you’re not using

Gyms are solitary; squash is social. Clubs tend to be tight-knit—ratings boards, ladders, leagues, and drop-in nights make it easy to meet professionals outside your usual circles. Post-match conversations often run longer than the game. If golf is a half-day relationship builder, squash is the 45-minute version with just as much rapport and none of the weather dramas.

Tip: Join a weekly box league or internal ladder. You’ll get curated opponents at your level and a consistent reason to play.

4) Logistics that actually work for a busy week

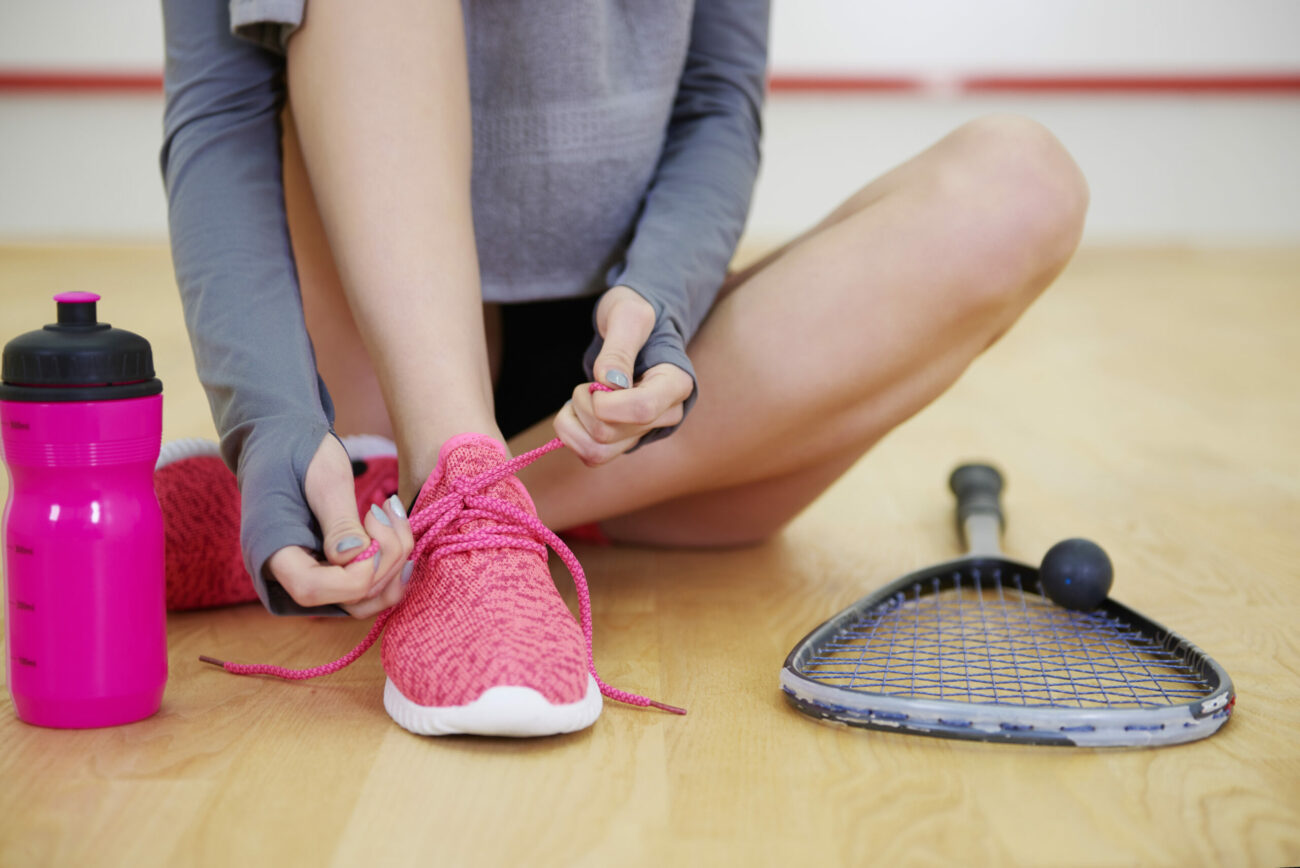
  • Indoor & weather-proof: No rainouts, no darkness, predictable conditions year-round.
  • Minimal gear: Non-marking court shoes, a racket, protective eyewear, a couple of balls. Keep them in a small backpack at the office or in your car.
  • Easy to schedule: Courts book by the 30–45-minute slot. You can thread a game between meetings or on travel days.
  • Quick to clean up: You’ll sweat, but you’re one shower away from your next call.

5) High ROI for cognitive performance

Squash sharpens decision-making under time pressure. You’re constantly reading angles, predicting bounces, and choosing shots. That blend of tactical reasoning and physical execution builds fast pattern recognition—a mental skill that transfers to work: prioritizing, reacting, and staying composed with incomplete information.

6) Clear progression without a huge time burden

Busy professionals crave progress markers. Squash provides them:

  • Consistency of length (how often your drives reach the back).
  • T-control (how frequently you recover to the center).
  • Fewer unforced errors (drops above the tin, boasts too high).
  • Ladder ranking or league results.

With two sessions a week, many beginners see noticeable improvements in 4–6 weeks—especially in stamina, footwork, and rally structure.

7) Safe enough to be sustainable

Squash is intense, but you can control the pace. Smart habits reduce injury risk:

  • Warm-up 5–8 minutes (hip openers, calf/hamstring mobility, light ghosting).
  • Non-marking shoes with good lateral support.
  • Protective eyewear during games.
  • Let & stroke awareness (call a let if a swing isn’t safe).
  • Gradual load: start with 1–2 sessions/week and add time, not maximal intensity.

8) Your “executive” training plan (two or three days/week)

Option A: 2× per week (45 minutes each)

  • Warm-up → solo straight drives → serve practice → conditioned games → cool-down
  • Match day → 25 min play → short conditioning → stretch

Option B: 3× per week (30–35 minutes each)

  • Ghosting intervals and volley drills
  • Serve + return practice + short games
  • Match play + cool-down

Business travel hack: Pack a jump rope and reaction ball. If you can’t find a court, do 15 minutes of hotel-gym intervals and reaction drills to stay sharp.

9) Quick-start checklist

  • Book a taster session at a nearby club.
  • Buy once, use often: non-marking shoes, a mid-weight racket (130–140g), single-yellow ball.
  • Learn three basics: lob serve, straight drive (rail), recover to the T.
  • Track one metric each week (unforced errors, T-control).

10) Common objections (and fast fixes)

  • “I don’t have time.” You don’t need an hour. A 35–45 minute court block delivers a complete workout.
  • “I’m not fit enough yet.” Squash gets you fit. Start slower, rest more, and fitness will follow.
  • “No one at my level.” Leagues and ladders place you with similar players and adjust as you improve.
  • “I travel too much.” Many city clubs offer day passes. Bring shoes and a racket; email ahead for a guest slot.

11) Why squash beats common alternatives for busy pros

  • Running: Time-flexible, but limited skill element and higher joint stress.
  • Weights-only: Good for strength, less for cardio or social connection.
  • Tennis: Great, but weather-dependent and time-intensive.
  • HIIT classes: Efficient but generic; squash adds skill, competition, and networking.

Final Rally

Squash is almost engineered for the modern professional: short sessions, big results, zero guesswork. It delivers cardiovascular fitness, power, coordination, and mental clarity in less time than most workouts—and it pairs that with a ready-made community that expands your network while you unwind.

Start small: book a 45-minute court, learn a high lob serve and a straight drive, and focus on owning the T. Two sessions a week will change how you feel at 4 p.m., how you sleep at night, and how calm you are in high-stakes conversations.

For busy professionals, that’s not just a sport—it’s a strategic advantage.

Squash Shoes vs. Other Court Shoes: What’s the Difference?

Walk into any sports store and you’ll see a wall of “court shoes”—tennis, badminton, volleyball, pickleball—plus a few pairs labelled specifically for squash. They all look similar: low-cut, grippy, supportive. So why do coaches and clubs insist on squash shoes? Because the demands of squash—tight corners, constant braking, violent lateral cuts, and forward lunges—are unlike any other indoor sport. The right shoe isn’t just about comfort; it’s about traction, stability, injury prevention, and confidence every time you explode off the T.

Below is a clear, no-nonsense breakdown of what sets squash shoes apart, how they compare to other court shoes, and how to choose the right pair for your game.

1) Movement Profile: Why Squash Is Different

  • Short, explosive distances: Squash rallies happen within a few meters. You need instant grip, not rolling momentum.
  • Hard braking + re-acceleration: Constant stop–start sprints hammer your feet and ankles; the shoe must resist shear (sideways slide) and twist.
  • Deep lunges: Front-court retrievals demand a stable forefoot, reinforced toe box, and smooth toe-drag.
  • 360° direction changes: Micro-adjustments on the T require torsional rigidity (midfoot doesn’t twist) and predictable traction.

Takeaway: A squash shoe is built for lateral stability and multi-directional grip on indoor wooden or synthetic floors—not for cushioning long runs or for gritty outdoor surfaces.

2) Outsole & Rubber: Grip That Doesn’t Mark

  • Squash shoes: Use soft, non-marking gum rubber optimized for polished wood or PU sports floors. The compound is tacky to bite during sudden stops and toe plants.
  • Badminton/volleyball shoes: Also non-marking and grippy, often similar compounds. Differences show up in tread patterns and forefoot stiffness (squash needs more side-to-side bite and toe-drag resilience).
  • Tennis/pickleball shoes: Designed for abrasive outdoor or acrylic courts. Rubber is harder to withstand wear, which can feel slippery on indoor wood. Many are not officially “non-marking,” risking black scuffs.
  • Running shoes: Outsoles prioritize forward traction and durability on pavement; tread and rubber blends are wrong for indoor grip and can be too grabby in the wrong direction or simply slide sideways.

What to look for: A flat, fine herringbone or radial pattern with broad contact area and “suction” feel. Always confirm NON-MARKING.

3) Midsole & Cushioning: Low, Stable, Responsive

  • Squash shoes: Lower heel-to-toe drop (often ~6–10 mm) and firmer midsoles to keep you planted during cuts. Cushioning is present but tuned for short, repeated impacts and fast court feel.
  • Badminton/volleyball: Often slightly bouncier for repeated jumps/landings. Great for comfort, but some models can feel too soft or wobbly in deep lunges.
  • Tennis/pickleball: More heel cushioning for longer points and harder surfaces; can raise your center of gravity indoors, reducing feel and agility.
  • Running: High stack and soft foam designed for forward motion. This promotes ankle roll in lateral moves and slows reactions on the T.

What to look for: A stable, medium-firm midsole that feels connected to the floor—enough cushioning to protect your joints, without “trampoline” bounce.

4) Lateral Support & Torsion: The Injury Decider

  • Squash shoes: Emphasize outrigger sidewalls, wrap-around medial/lateral cages, and torsion plates/shanks to stop the shoe from folding on hard cuts. Uppers are reinforced around the forefoot and midfoot for containment.
  • Badminton/volleyball: Good lateral features, but some prioritize jump comfort over aggressive cut stability. Try them, but test hard side pushes.
  • Tennis/pickleball: Very good lateral support—built for side movement—but rubber and tread tuning are off for indoor floors.
  • Running: Minimal lateral containment; uppers stretch in the wrong directions.

What to look for: Try a “twist test”: grip heel and forefoot and rotate. Less twist = better torsional support. In a lunge, your forefoot shouldn’t bulge over the edge of the midsole.

5) Toe Box, Toe Drag & Forefoot Rocker

  • Squash shoes: Reinforced toe bumpers and smooth overlays for controlled toe drag on lunges and boasts; slight forefoot rocker helps roll out of a lunge.
  • Badminton: Also good toe reinforcement; sometimes narrower toe boxes.
  • Volleyball: Adequate, but not always tuned for abrasive toe drags.
  • Tennis/pickleball: Stout toe guards for hard courts, but the outsole transition can feel sticky on indoor wood.

What to look for: A durable yet smooth toe bumper (no sharp edges), room for natural toe splay, and no pressure hotspot on the big toe during deep lunges.

6) Upper Materials, Lockdown & Breathability

  • Squash shoes: Multi-layer mesh with PU or TPU reinforcements around the midfoot and eyelets; internal heel counters for lockdown; padded but not bulky tongues.
  • Badminton/volleyball: Similar builds; some models lighter and airier.
  • Tennis/pickleball: Heavier duty uppers for abrasion; can feel warmer and stiffer indoors.
  • Running: Very breathable but stretchy—not ideal for side containment.

What to look for: Secure midfoot wrap without over-tightening laces. The heel should lock with zero slip. Mesh should breathe but hold shape.

7) Fit & Sizing: Squash-Specific Tips

  • Length: A thumb’s width in front of the longest toe to protect during downhill (forward) lunges.
  • Width: Enough forefoot splay to stay stable in deep positions. Too narrow = numb toes; too wide = sloppy cuts.
  • Arch/instep: If you have high arches, check that the tongue/eyelets don’t bite when cinched hard.
  • Try with your socks: Court socks are thicker—bring them.

Quick test routine (in-store):

  1. Split step → lateral shuffle → hard stop.
  2. Deep lunge with toe drag.
  3. Figure-8 cuts around boxes/racks (carefully!).
    If you feel heel slip, side roll, or hot spots, pass.

8) Can You Use Other Court Shoes for Squash?

  • Badminton: Often the closest substitute. Choose models with firmer midsoles and solid sidewalls.
  • Volleyball: Fine for casual play; prioritize pairs with torsion shanks and not-too-soft foam.
  • Tennis/Pickleball: Not ideal indoors—rubber hardness and tread are mismatched; risk of marking and sliding.
  • Running/Trainers: No. Highest injury risk for ankles/knees.

Club rule: Many facilities require non-marking soles. Some tennis/pickleball shoes fail this test.

9) Maintenance & Lifespan

  • Rotation: If you play 2–3×/week, consider rotating two pairs to let foam rebound and the upper dry out.
  • Cleaning: Wipe the outsole with a damp cloth—restores tackiness. Avoid silicone sprays; they can alter grip.
  • Storage: Air-dry; remove insoles post-session. Avoid hot car boots—heat breaks down glues/foams.
  • Replacement window: 60–100 on-court hours for peak grip and support (varies by weight, surface, and movement style). If you’re slipping more or the midfoot feels soft/twisty, it’s time.

Final Rally

The “squash” label isn’t marketing fluff—it signals a shoe engineered for hard braking, deep lunges, and violent lateral cuts on indoor floors. While some badminton or volleyball models can cross over, nothing beats a squash-focused design for the mix of non-marking grip, torsional control, and forefoot stability the sport demands.

Choose a pair that passes your split–cut–lunge test, locks the heel, and feels planted without deadening your footwork. Keep the soles clean, rotate when you can, and replace them once support fades. Your reward: safer joints, quicker reactions, and the confidence to attack the T—without thinking about what’s on your feet.

How to Choose the Right Squash Racket for Your Playing Style

Walk into any sports shop and you’ll see a wall of gleaming squash rackets—some feather-light, some head-heavy, some with teardrop shapes, others with classic bridges. To a beginner, they all look impressive, but to a player, each frame whispers a different promise. One racket says “I’ll give you effortless power.” Another insists “I’ll sharpen your control.” The real challenge is figuring out which one will actually help your game.

Every squash player has a unique style. Some dominate with punishing length and raw power, grinding opponents down. Others thrive on finesse—delicate drops, deceptive flicks, and lightning volleys. And then there are the retrievers, the tireless hustlers who seem to chase down every ball and turn defense into attack. The truth is, the right racket can amplify your natural strengths and even compensate for weaknesses—but the wrong one can make every rally feel like a battle against your own equipment.

Think of your racket as an extension of your arm, not just a tool. The weight, balance, head shape, and strings each add up to how the racket feels in your hand—and how it responds when the ball explodes off the front wall. That’s why choosing a racket isn’t about price tags or flashy branding—it’s about finding a partner that plays the way you play.

In this guide, we’ll break down the essential racket features and map them to playing styles. Whether you’re an aggressive shot-maker, a patient retriever, or an all-round strategist, you’ll discover how to pick the frame that turns your game plan into results

Start With Your Playing Style

Before specs, be honest about how you win points right now (or want to in six months):

  • Power baseliner (length-first): You live on straight rails and deep crosscourts; you want the ball to fly with a clean swing.
  • Touch/attacking player (front-court artist): You love drops, holds, and volley kills; you want maneuverability and feedback.
  • Retriever/counterpuncher: You chase everything and turn defense to offense; you need forgiveness and stability on off-center hits.
  • All-rounder: You do a bit of everything; you want a balanced frame with no drama.

Hold that identity in mind as we map specs to feel.

1) Weight: 110g–150g (unstrung)

Lighter (110–125g):

  • Pros: Faster swing, easier deception and volleying, quick recovery from the T.
  • Cons: Can feel twitchy on mishits; may produce less effortless length unless your technique is clean.
  • Best for: Front-court attackers, deft volleyers, players with good timing.

Mid (125–140g):

  • Pros: Sweet spot of stability and speed; suits most club players.
  • Cons: None, really—this is the safest band.
  • Best for: All-rounders, improvers, anyone unsure.

Heavier (140–150g+):

  • Pros: Planted through contact, easy length, solid on off-center strikes.
  • Cons: Slightly slower for rapid volleys and last-second holds.
  • Best for: Retrievers, power baseliners, players who value stability.

Reality check: “Light” doesn’t automatically mean “easier.” If your contact is inconsistent, a mid or heavier frame can mask timing imperfections and reduce shock.

2) Balance: Head-Light, Even, Head-Heavy

Head-Light:

  • Feel: Whippy, fast at the T, great for late volleys and quick counter-drops.
  • Trade-off: You supply more of the power.
  • Who benefits: Touch players, volley hunters.

Even Balance:

  • Feel: Neutral; power and maneuverability in equal measure.
  • Who benefits: All-rounders, improvers.

Head-Heavy:

  • Feel: The head “leads” the swing; the ball leaves deep without effort.
  • Trade-off: Slightly slower in hand.
  • Who benefits: Length-first, heavier hitters, retrievers needing free depth.

Combo tip: A light and head-heavy frame can still feel potent; a heavier and head-light frame can feel surprisingly nimble.

3) Head Shape & Sweet Spot

  • Teardrop (open throat):
    • Bigger sweet spot, more natural power, lively feel.
    • Great for players who want help on length and off-center hits.
  • Bridged/Closed throat:
    • Tighter control, more linear feedback, classic feel for precise hitting.
    • Great for players who prize accuracy on straight rails and drops.

If you’re newer or inconsistent, teardrop forgives. If you’re precise and love laser-straight rails, closed throat rewards you.

4) Stiffness & Feel

  • Stiffer frames:
    • Crisp contact, quick rebound, lively ball.
    • Less dwell time (the ball doesn’t “sit” on the strings).
    • Suits compact swings and players who like a direct response.
  • More flexible frames:
    • Softer feel, extra dwell, easier touch on drops/lobs.
    • Can feel slightly muted on big hits.
    • Suits touch players and those sensitive to shock.

Arm comfort matters. If you’ve had elbow/wrist niggles, lean toward mid-flex and pair with a softer string/tension.

5) Strings & Tension (the easiest performance upgrade)

Factory strings are often average. A basic restring can transform feel.

  • Gauge: 1.20–1.25 mm is a great balance of bite and durability.
  • Tension:
    • Lower (20–24 lbs / 9–11 kg): More power, bigger sweet spot, softer on the arm.
    • Higher (24–28 lbs / 11–13 kg): More control and crispness, smaller sweet spot.
  • String type:
    • Textured/micro-rough for spin and bite on drops/cuts.
    • Smooth multifilament for comfort and pop.

If shots feel dead or harsh, drop tension a couple of pounds before blaming the frame.

6) Grip Size & Overgrips

A grip that’s too thin makes you over-squeeze; too thick reduces wrist dexterity.

  • Your index finger should just fit between fingertips and palm when holding naturally.
  • Add a tacky overgrip for humidity and replace when slick. Fresh grip = instant control boost.

7) Durability & Build

  • Bumper guards and grommets matter—easy to replace means longer racket life.
  • Frames with robust bumpers protect against wall scrapes (inevitable in squash).
  • If you’re a frequent wall-brusher, avoid ultra-light, super-stiff frames unless you’re comfortable with the risk.

8) Budget Tiers (what to expect)

  • Entry (affordable): Solid all-rounders, slightly heavier, durable; great for beginners and casual club play.
  • Mid-range: Best value—modern layups, better feel, customizable with strings; suits most improvers.
  • Premium: Lighter, more refined balance, specific feel (ultra-stiff or ultra-soft), often best after you know your preferences.

Spend more on restrings over time than on chasing the lightest frame. A well-strung mid-range racket beats a poorly-strung flagship every day.

Top 5 Squash Rackets to Buy in 2025

Choosing a racket is about matching specs to style, but sometimes you just want trusted recommendations to narrow the field. Here are five of the best squash rackets to buy in 2025, each suited for different types of players—from attacking shot-makers to steady retrievers.

1. Head Graphene 360+ Speed 125 Squash Racket

HEAD Graphene 360 Speed 125 Squash Racquet

  • Weight: 125g (light)

  • Balance: Head-light

  • Why it’s great: Built for speed and maneuverability, this racket is perfect for aggressive players who love volleying and taking the ball early. The Graphene 360+ technology offers stability and energy transfer, giving you crisp shots without losing control.

  • Best for: Attacking players, front-court specialists, and those who thrive on deception and quick hands.

2. Head Microgel Blast Squash Racket

HEAD Microgel Blast Squash Racquet

  • Weight: 135g (medium-heavy)

  • Balance: Even

  • Why it’s great: A powerhouse for baseline players, the Microgel Blast has excellent stability and forgiveness, making it ideal for those who rely on depth and consistency. Its larger head size gives you a generous sweet spot.

  • Best for: Defensive retrievers and consistent ralliers who value control and length.

3. Head Radical 135 SB 2022 Squash Racket

  • Weight: 135g

  • Balance: Slightly head-heavy

  • Why it’s great: Designed for players who want both touch and power, this racket has a smaller beam (SB) for tighter control and precision. It’s versatile enough for all-rounders but still packs depth when needed.

  • Best for: All-round players who mix attacking volleys with reliable backcourt play.

4. Prince Vortex Elite 600 Squash Racket

Prince Vortex Elite 600 Squash Racquet

  • Weight: 125g (light)

  • Balance: Head-heavy

  • Why it’s great: The Prince Vortex Elite combines light weight with a head-heavy balance, giving players explosive power without sacrificing speed. It’s perfect for players who like to dominate with hard-hitting drives and kills.

  • Best for: Power hitters who want depth and pace with minimal effort.

5. Tecnifibre Carboflex 125 X-Top V2 Squash Racket

TECNIFIBRE Carboflex 125 X-Top V2 Squash Racquet

  • Weight: 125g

  • Balance: Even

  • Why it’s great: The flagship of Tecnifibre’s line, the Carboflex series is trusted by top pros worldwide. The 125 X-Top V2 is incredibly versatile, with a great mix of power, control, and maneuverability. Its innovative construction reduces vibration and increases feel.

  • Best for: Advanced and ambitious players looking for a pro-level racket that does everything well.

Quick Matching Guide (Style → Specs)

  • Power Baseline / Length-First
    • Weight: 130–140g
    • Balance: Even to Head-Heavy
    • Head shape: Teardrop
    • Feel: Stiffer
    • Strings: Mid tension, 1.20–1.25
  • Touch & Volley Attacker
    • Weight: 115–130g
    • Balance: Head-Light to Even
    • Head shape: Closed throat (or forgiving teardrop if you still want help)
    • Feel: Mid-flex to softer
    • Strings: Slightly higher tension for control
  • Retriever / Counterpuncher
    • Weight: 135–145g
    • Balance: Even to Head-Heavy
    • Head shape: Teardrop (bigger sweet spot)
    • Feel: Mid-stiff for stability
    • Strings: Lower tension for depth and comfort
  • All-Round Club Player
    • Weight: 125–135g
    • Balance: Even
    • Head shape: Either (test both)
    • Feel: Mid-flex
    • Strings: Middle-of-the-road tension

Final Rally

Choosing a squash racket is about aligning physics with personality. If you love attacking the front, prioritize maneuverability, head-light balance, and feel. If you win with depth and patience, go for stability, a friendlier sweet spot, and perhaps a touch of head-heaviness. Most players thrive in the 125–140g, even-balance middle ground—then fine-tune with strings and grip.

Test deliberately, restring intelligently, and let comfort guide you. When the frame amplifies your natural game, you’ll notice it immediately: length comes easier, volleys arrive earlier, and your touch around the tin feels honest. That’s the right racket—built not just for squash, but for your squash.

From Jahangir to Nicol: The Greatest Squash Players To Have Ever Played The Sport

Squash may not have the global TV audiences of tennis or football, but among racket sports it has a reputation like no other—fast, brutal, tactical, and deeply respected by those who play it. Inside four white walls, players are pushed to the limits of stamina, speed, and skill. Matches often look like a blur of lunges, volleys, and impossible retrievals, yet behind the chaos lies years of discipline, training, and brilliance.

Throughout its history, squash has produced legends who didn’t just win matches—they redefined the game. Some were known for relentless fitness that ground down every opponent. Others dazzled with artistry, deception, or sheer dominance over an era. Their names—Jahangir, Jansher, Nicol, Sherbini—still echo in clubs and courts worldwide, inspiring new generations to pick up the racket.

But what makes someone the “greatest”? Is it an unbeaten streak that lasts half a decade? Is it holding the world number one spot for nearly a decade straight? Is it artistry that leaves fans breathless, or is it the cold, hard count of titles won? In truth, greatness is a blend of all these factors, and squash has been lucky to witness it across multiple eras, from Pakistan’s golden Khan dynasty to the modern Egyptian wave of champions.

In this article, we’ll look at the greatest squash players of all time—both men and women. From Heather McKay’s unmatched dominance to Nicol David’s decade at the top, from Jahangir Khan’s legendary streak to Ramy Ashour’s creative genius, we’ll celebrate the players who turned squash into a sport of legends.

Greatest Men’s Squash Players of all time

Jahangir Khan (Pakistan)

Jahangir Khan The Greatest Squash Player in the World - Economy.pk

Often first in any GOAT conversation, Jahangir went on a 555-match unbeaten streak spanning five years (1981–1986)—an anomaly in any racket sport. His fitness, mental strength, and ability to grind out wins set new standards. He won multiple World Opens and British Opens and dominated during the 1980s.

Jansher Khan (Pakistan)

Squash champion Jansher Khan playing a World Open final against his ...

Jansher is often paired with Jahangir in legacy debates. He holds eight World Championship titles, still the record for men. He also collected numerous major titles and remained world number 1 for long stretches. His rivalry with Jahangir defined a golden era of Pakistani dominance.

Geoff Hunt (Australia)

SQUASH AUSTRALIAN SQUASH Player Geoff Hunt In Action 1976 Old Photo EUR ...

Before the Khans, Geoff Hunt was a dominant force in the 1970s and early 1980s. He won multiple British Opens and was world number one for extended periods. His consistency, tactical intelligence, and adaptability made him a benchmark for later generations.

Peter Nicol (Scotland / England)

‘I Want To Improve Spanish Squash’ - Borja Golan Unveils Post ...

Nicol bridged eras with success in the late 1990s and 2000s. He won the World Championship and British Open, and was ranked world number one. He is respected for his shot-making and consistency across many seasons.

Ramy Ashour (Egypt)

Ramy Ashour - Squash Source

One of the most talented and creative players ever. Ashour’s style was flamboyant—drop volleys, kills out of nowhere, deceptive shots. He won multiple world titles despite injuries hindering parts of his career. Many fans cite him as the “Ronnie O’Sullivan” of squash.

Modern Names

  • Ali Farag (Egypt): A balanced, intelligent player who blends power and control. He’s had multiple stints as world number one.

  • Mohamed El Shorbagy (Egypt): Aggressive, powerful, and fiercely competitive—he’s captured numerous major titles.

Greatest Women’s Squash Players of all time

Nicol David (Malaysia)

Malaysian Squash Star David Named World Games' Greatest Athlete of All ...

Widely regarded as the greatest female squash player of all time. She held World No. 1 for 108 consecutive months (2006–2015) and won eight World Championship titles. Her consistency, work ethic, and humility made her a role model globally.

Nour El Sherbini (Egypt)

Nour El Sherbini - Squash Source

A modern icon. With her eighth world title in 2025, she matched Nicol David’s all-time women’s record. She has been a fixture at the top for more than a decade, combining nerves of steel with attacking flair and mental resilience.

Heather McKay (Australia)


Heather McKay: Sport's greatest, mysterious record - PSA Squash Tour

A name from squash’s earlier eras, McKay remains legendary. She won 16 consecutive British Open titles from 1962–1977 and lost almost no matches in her prime. Her dominance in her time is unmatched, and many see her as a pioneer for women’s squash.

Susan Devoy (New Zealand)

Former world squash champion Susan Devoy stars in New Zealand reality ...

She held world number one status multiple times and captured world titles in the late 1980s and early 1990s. Her longevity and ability to sustain top-level performance make her one of the greats.

Sarah Fitz-Gerald (Australia)

Australian Legend Sarah Fitz-Gerald Predicts 'Mammoth Battles' at ...

A dominant force in the 1990s, she won several World Championships and was often ranked at the top. Her style was tactical, precise, and mentally tough.

Final Rally

Greatness in squash can’t be measured by numbers alone. Yes, the stats are staggering—Jahangir Khan’s 555-match unbeaten streak, Jansher Khan’s eight World Championship titles, Nicol David’s 108 months at World No.1, Nour El Sherbini’s record-equaling eight world crowns—but beyond the records lies something more powerful. It’s the way these players changed the way squash was played, inspired nations, and left a legacy that outlives their time on court.

From Pakistan’s Khan dynasty that defined the sport in the 1980s and 1990s, to Australia’s Heather McKay and Sarah Fitz-Gerald who set impossible standards, to Nicol David’s reign that made squash a household name in Asia, to Egypt’s golden generation led by Nour El Sherbini and Ramy Ashour—each era brought a different flavor of dominance. Together, they form a lineage of champions whose impact transcends trophies.

Ask ten squash fans who the greatest player of all time is, and you may get ten different answers. For some, it’s the unbeatable aura of Jahangir Khan. For others, it’s Nicol David’s longevity and grace under pressure. Some will point to the artistry of Ramy Ashour, others to the steely resolve of Jansher or Sherbini. The truth is, there isn’t one single “greatest.” There are many, each carving their name into squash history in their own way.

What unites them is their ability to make the game bigger than themselves. They showed us that squash is not just about chasing a ball in a box—it’s about resilience, creativity, and the pursuit of perfection. And that’s why when we talk about the greatest squash players of all time, we’re not just counting titles—we’re celebrating the spirit of a sport that continues to inspire, challenge, and thrill.

Top Squash Drills to Improve Stamina and Reflexes

Squash is a sport of extremes—your lungs burn from relentless rallies, while your brain fires split-second decisions at lightning speed. One moment you’re chasing a ball deep into the corner, the next you’re lunging forward for a drop shot you barely saw coming. To thrive in this environment, two things matter most: stamina and reflexes.

Stamina keeps you moving with energy even in the fifth game, while reflexes give you the sharpness to intercept volleys, read opponents, and react in time. The good news? Both can be trained with court-based drills that mimic real match demands.

Below, you’ll find a set of practical squash drills designed specifically to build endurance, sharpen reactions, and give you the edge in every rally.

1) Ghosting Intervals

Court movement without the ball. Sprint from the T to all corners, lunge properly, and recover. Builds stamina and footwork memory.

Protocol: 30s on, 30s rest × 8. Increase to 45s on, 20s rest as you progress.

2) Boast–Drive Routine

With a partner: Player A boasts, Player B drives straight, repeat. Builds lung capacity while training front-to-back movement.

Protocol: 3 minutes continuous × 4 sets. Switch roles each set.

3) Corner Repeaters

Feed balls alternately to front and back corners, forcing quick recoveries. Simulates real rally patterns.

Protocol: 45s work, 20s rest × 6.

4) Figure-8 Volleys (Solo)

Volley the ball in a looping pattern between the side walls without letting it bounce. Enhances racket control and reaction time.

Protocol: 30s continuous × 6. Count unbroken streaks to track progress.

5) Two-Ball Reaction Drill

Partner feeds two balls randomly in quick succession. Forces instant decision-making and sharp hands.

Protocol: 20s on, 20s off × 10.

6) Anticipation Drops

Feeder mixes boasts, crosscourts, and drops. The receiver must read cues and respond instantly.

Protocol: 12 feeds × 3 sets. Switch roles.

7) Reaction Ball Bounces (Off-Court)

Use a reaction ball against a wall or floor. The odd bounces mimic unpredictable squash ricochets.

Protocol: 6×30s bouts with 30s rest.

8) Shuttle Sprints (15/15s)

Sprint from baseline to front wall and back. Repeat until the timer ends. Builds explosive stamina.

Protocol: 15s sprint, 15s rest × 12–16.

9) Serve–Volley Trap

Serve, sprint to the T, and volley the first return. Improves reflexes and conditioning simultaneously.

Protocol: 3×3 minutes per side.

10) King/Queen of the T (Conditioned Game)

Play mini-games where volleys and rails are the only shots allowed. Fast-paced, reflex-heavy, and tiring.

Protocol: First to 5 points, rotate.

Final Rally

Squash is often called “the world’s fittest sport” for a reason—it pushes both your body and brain to their limits. By adding these squash drills to your weekly routine, you’ll build the stamina to outlast your opponents and the reflexes to outsmart them.

Remember: stamina lets you reach the ball; reflexes let you strike it back. Together, they turn rallies from desperate scrambles into winning opportunities. Train both, and you’ll not only survive the pace of squash—you’ll thrive in it.

The Art of the Serve: Squash Serving Techniques for Beginners

A great serve in squash is like a well-scripted opening scene—it sets the tone, steals time from your opponent, and gives you first claim to the T-position. For beginners, mastering a few simple, high-percentage serves (and knowing when to use them) can turn stressful first rallies into controlled, winnable points. This guide breaks down the rules, footwork, core serve types, placement targets, and easy drills so your serve becomes a reliable weapon—not just a formality.

First, know the serve rules (so you don’t give away free points)

  • Foot placement: At least one foot fully inside the service box (not touching the lines) when you strike the ball.
  • Front wall target: Your serve must hit the front wall above the service line.
  • Landing zone: After the front wall, the ball must land in the opposite back quarter (it may touch side/back walls after the front wall and still be good).
  • Alternating boxes: Win a point, switch boxes for the next serve.
  • Faults to avoid: Side wall before front wall, ball below the service line (down), ball out above the out line, or landing in the wrong quarter.

If you’re clean on these, you’ll keep pressure on the receiver from rally one.

Serve setup: stance, grip, and contact

  • Grip: Neutral “handshake” grip; keep pressure relaxed (4–6/10), tighten briefly at contact.
  • Stance: Shoulders roughly parallel to the side wall; back foot near the rear corner of the service box, front foot pointing slightly toward the front wall target.
  • Ball toss: Think “drop” rather than a high toss—waist-to-chest height so contact is repeatable.
  • Contact point: Slightly in front of your front hip; extend the arm and finish high for height/shape.
  • Hold the pose: A still head and balanced finish improve consistency—and disguise.

The four beginner-friendly serves (with when to use each)

1) The High Lob Serve (bread-and-butter)

What it is: A high, arcing ball that hits the front wall just above the service line and floats deep into the back corner of the opposite side—ideally hugging the side wall after the bounce.

Why it works: It buys you time to recover to the T, forces the receiver to hit under pressure near the glass, and limits their attacking volley.

How to hit it:

  • Aim just above the service line on the front wall.
  • Open the racket face slightly; think “lift,” not “drive.”
  • Visualize a landing point two racquet lengths from the back wall and one racquet width from the side wall.

Common mistake to avoid: Too low (sits up to volley) or too central (easy return). Miss high and wide, not low and middle.

2) The Body Serve (jammer)

What it is: A faster, shoulder-to-hip-height serve that heads toward the receiver’s body on their backhand side (for most players) before bouncing deep.

Why it works: It crowds their swing, forcing a weak, short return you can pounce on.

How to hit it:

  • Aim at the front wall target that projects a line through the receiver’s torso.
  • Keep the trajectory flatter than a lob but not reckless—think controlled pace.
  • Recover to the T quickly; body serves often come back fast.

Use it when: Your opponent is stepping early to volley your lobs or standing too close to the side wall.

3) The Width Serve (side-wall kiss)

What it is: A medium/high serve that clips the side wall shortly after the front-wall hit, then drops steeply into the back quarter.

Why it works: The early side-wall contact changes angle and kills pace, making timing awkward.

How to hit it:

  • From the right box, aim left-of-center on the front wall (mirror from the left box).
  • Visualize a V-shaped path: front wall → near side wall → deep corner.
  • Keep height generous; width without height is a sitter.

Use it when: Opponents like to take the ball early; the side-wall kiss steals their comfort.

4) The Flat Drive Serve (surprise change-up)

What it is: A lower, quicker serve that hits above the service line but travels flatter and lands near the back boundary quickly.

Why it works: As a surprise—not a staple. It rushes the receiver and invites a short, defensive reply.

How to hit it:

  • Contact slightly earlier and drive through the ball.
  • Aim just above the service line; keep it tight to the side wall.
  • Use sparingly; a miss hits the tin or sits up to be punished.

Use it when: You’ve established height with lobs and your opponent is backing off, expecting another one.

Box-by-box tactics: which side favors which serve?

  • From the right box (to left back quarter):
    Most right-handers receive backhand here. Favor high lob and width to pin them; sprinkle in body serves to the hip/racket-hand.
  • From the left box (to right back quarter):
    You’re often serving to their forehand. Use higher, deeper lobs (less jam potential) and the side-wall width to move them late.

General rule: Target the receiver’s weaker wing (usually backhand) more often, but keep mixing height/angle/pace to avoid patterns.

Serve placement: think targets, not just types

Picture each back quarter as a 3×3 grid (front-to-back, wall-to-center):

  1. Back-wall nick zone (deep & wide): Primary lob target.
  2. Shoulder/hip corridor: Body serve lane to jam the swing.
  3. Side-wall kiss lane: Early side-wall contact to distort timing.
  4. Deep central strip: Risky—avoid unless it’s a planned flat drive surprise.

Coaching cue: “Miss wide, miss high.” If you’re going to miss, sail it close to the out line rather than drop it short and central.

The serve + first step: claim the T

Serving is only half the opener; your recovery is the other half.

  • Serve → two fast recovery steps → split step at the T.
  • Racket up, eyes on opponent.
  • If your serve is strong (late/awkward return), look to volley the first reply and keep the opponent behind you.

Bad habit to kill: Watching your serve instead of moving. Hit, move, then read.

Reading the receiver (and adapting mid-match)

  • If they volley early: more height and width; lift the contact point on the front wall.
  • If they stand off the back wall: flatten the trajectory or body-serve into their stance.
  • If they chip short crosscourt: follow your serve into the T and be ready to intercept with a volley straight drive or drop.
  • If they boast frequently, expect it from cramped positions—recover slightly forward after serving to pounce.

Serve patterns should evolve; note what drew the worst return and repeat with variation (same height, different lane; same lane, different pace).

Five simple serve drills (10–12 minutes each)

  1. Lob Ladder
    Aim for front-wall height bands: just above service line → halfway to out line → ¾ height. 10 makes per band from each box.
  2. Deep-Corner Bingo
    Place two cones: one a racquet width from the side wall, one two racquet lengths from the back wall. Score a point for each serve that lands between them and dies near the glass.
  3. Body-Line Accuracy
    Have a partner stand at the typical receiving spot. Chalk a chest-high target on the front wall. Hit through the torso line without over-hitting; 20 reps/box.
  4. Width Kiss Builder
    Mark a rectangle on the side wall about 1.5–2 m behind the short line. Serve so that the ball touches that rectangle after the front wall. 15 clean kisses/side.
  5. Serve + First Volley
    Serve, recover to the T, partner returns anywhere; your only goal is to volley the first return and play length (straight rail). 3 sets × 3 minutes, switch roles.

Final Rally

In squash, you don’t need a dozen fancy serves—you need two or three you trust and the discipline to recover to the T after you hit them. Master a high lob that dies deep, a body serve that jams the backhand, and a width serve that kisses the side wall. Layer in smart placement, crisp footwork, and a first-volley mindset, and you’ll start every rally on your terms.

Serve with purpose, recover with intent, and let your opponent be the one reacting. That’s the art of the serve—and the fastest way for beginners to feel in control from the very first shot.

A Complete Guide to Squash Court Markings and Dimensions

Four walls, a small ball, and countless lines—if you’re new to squash, the court can look more like a puzzle than a playing field.

The first time most beginners step onto a squash court, they notice the maze of red or white lines crisscrossing the floor and walls. It’s not always clear where to stand, how the serve works, or why some balls are “in” and others are “out.” But once you understand the markings and their purpose, the chaos melts into clarity. Those lines aren’t random—they’re the blueprint that keeps squash fast, fair, and tactical.

This guide will walk you through the court layout and markings in squash, explaining what each line means and how it shapes the game. By the end, you’ll not only know where to stand but also how to use the court to your advantage.

1) Dimensions of a Squash Court

A standard singles squash court is:

  • Length: 9.75 meters (32 feet)

  • Width: 6.4 meters (21 feet)

  • Front wall height: 4.57 meters (15 feet)

  • Back wall height: 2.13 meters (7 feet)

Doubles courts are slightly wider (7.62 meters or 25 feet), but the markings are similar.

2) Floor Markings

Service Boxes

  • Two small squares near the front of the court.

  • The server must have one foot fully inside a box during the serve.

  • The ball must then land in the opposite back quarter.

Short Line

  • A line that runs across the court halfway between the front and back walls.

  • It divides the front and back of the court and is essential for serving.

Half-Court Line

  • Runs from the short line to the back wall, splitting the back of the court into left and right service areas.

  • Used to determine which quarter of the court the serve must land in.

3) Wall Markings

Out Line

  • Runs along the very top of the court walls.

  • Any ball that touches above this line is out.

Service Line

  • Horizontal line across the front wall, about halfway up.

  • During a serve, the ball must hit above this line.

Tin

  • The lowest boundary on the front wall, usually a metal strip.

  • If the ball hits the tin, it’s “down,” and the rally ends.

  • Think of it like the “net” in tennis.

4) The T-Position (Unmarked but Crucial)

While not an official marking, the T-position (where the short line and half-court line intersect) is the most important spot on the court. Controlling this central area allows players to reach shots in any direction quickly.

5) How the Markings Shape Play

  • Serving: The service boxes, short line, and half-court line dictate where the server stands and where the ball must land.

  • Rallies: The tin, out line, and front wall keep shots within playable boundaries.

  • Positioning: Players constantly return to the T to cover the court efficiently.

Quick Recap for Beginners

  • Serve with one foot in the service box.

  • The ball must cross the short line and land in the opposite back quarter.

  • Keep shots above the tin and below the out line.

  • Control the T for better positioning.

Final Rally

At first glance, a squash court might look like a confusing patchwork of lines and boundaries. But once you understand what they mean, the markings reveal the sport’s structure: where rallies begin, how points are won, and why positioning matters so much.

The court is more than just a playing surface—it’s a strategic map. The service boxes test your precision, the out lines demand control, and the T-position rewards smart movement. Master the layout, and you’ll not only follow the rules but also start using the court as a weapon in your game.

So next time you step onto the court, don’t just see the lines—play with them, around them, and within them. That’s where the real beauty of squash lies.

Essential Rules of Squash Every Player Should Know

From the moment the ball ricochets off the wall and you scramble to return it, you realize squash isn’t just about speed—it’s about precision, strategy, and respect for the rules that shape the game. For newcomers, though, stepping onto the court can feel confusing. Why so many lines? How does the serve really work? And what happens when you and your opponent collide in the middle of a rally?

That’s where the rules come in. They don’t just keep the game fair; they keep it safe, structured, and thrilling to play. Squash is often described as “chess at high speed,” and like chess, every move matters—but only if you know the framework guiding those moves.

In this guide, we’ll unpack the essential rules of squash every player should know. From court boundaries and scoring to lets, strokes, and simple etiquette, you’ll have everything you need to step on court with confidence and enjoy the game the way it’s meant to be played.

1) The Court and Boundaries

A squash court is a rectangular box, enclosed by four walls and the floor. The walls have markings that act as boundaries:

  • Out line: The topmost line around the court. Any ball above it is out.
  • Service line (front wall only): Used during serves; the ball must hit above this line when served.

  • Tin: The metal strip at the bottom of the front wall. If the ball strikes the tin, the rally ends.

  • Floor markings: The service boxes (small squares near the front) and lines that split the court into left/right and front/back zones.

Learning these lines is the first step to understanding how a rally plays out.

2) How the Serve Works

Every rally begins with a serve, and it has its own rules:

  • The server must have at least one foot fully inside the service box (not touching the lines).

  • The ball must hit the front wall above the service line and land in the opposite back quarter of the court.

  • If the serve hits the side wall before the front wall, it’s a fault.

  • Players alternate service boxes after winning points.

Tip: For beginners, the lob serve—high and deep into the back corner—is the most reliable way to start a rally.

3) Scoring Rules

Squash uses the point-a-rally (PAR) to 11 system:

  • Each rally won earns a point, regardless of who served.

  • Games are played to 11 points, but you must win by at least 2 points (e.g., 12–10, 14–12).

  • Matches are usually best of 3 or best of 5 games.

This scoring keeps matches fast and competitive.

4) How a Rally Works

Once the ball is in play:

  • Players hit the ball alternately.

  • The ball must hit the front wall before bouncing a second time on the floor.

  • It can hit side or back walls before reaching the front wall, as long as it doesn’t go out or strike the tin.

  • Players must clear space after their shot so the opponent has direct access to the ball.

Rallies continue until a player makes a mistake or a winning shot is played.

How to Play Squash: A beginner's guide

5) Let and Stroke Decisions

Since both players share a confined space, interference happens often. That’s where the let and stroke rules apply:

  • Let: A rally is replayed if interference prevents a fair shot, but no clear winner was denied. Example: your swing was blocked slightly but you could have retrieved the ball.

  • Stroke: A point is awarded to you if your opponent blocks your direct path to the ball, preventing a winning or safe return.

  • No let: If the interference is minimal and didn’t affect your ability to play the shot, play continues.

Golden rule: Always move out of the way after your shot. Clearing space is just as important as hitting the ball.

6) Safety Rules

Squash is safe when played with respect, but accidents happen if rules aren’t followed:

  • Never swing if your opponent is too close—call a let instead.

  • Always give your opponent direct access to the ball.

  • Wear protective eyewear in competitive or club play.

Safety ensures longer rallies and better games.

7) Common Faults to Avoid

  • Double bounce: Ball bounces twice before you return it.

  • Down: Ball hits the tin or floor before the front wall.

  • Out: Ball goes above the out line or outside boundaries.

  • Serve fault: Incorrect foot placement or serve landing in the wrong area.

Knowing these will save you from confusion mid-match.

8) Match Etiquette (Unwritten Rules)

Beyond official rules, etiquette keeps the game enjoyable:

  • Start and end with a handshake (or racket tap).

  • Call “let” clearly and fairly.

  • Retrieve balls quickly between points.

  • Wipe sweat patches if the floor gets slippery.

Good etiquette makes you the kind of opponent everyone enjoys playing against.

9) Beginners’ Quick Checklist

  1. Serve with one foot in the box.

  2. Ball must hit the front wall before bouncing twice.

  3. Keep shots above the tin and below the out line.

  4. Recover to the T after each shot.

  5. Always clear space for your opponent.

Final Rally

Squash may look like chaos from the outside—two players darting around a box, balls zipping in every direction—but once you know the rules, the chaos transforms into clarity. Every line, every serve, every call of “let” or “stroke” adds structure to the speed, making the rallies fair, competitive, and exhilarating.

For beginners, the rules are your foundation. They keep you safe, help you understand what’s happening in each rally, and allow you to focus on developing your skills instead of second-guessing the game. Mastering these essentials—court boundaries, serving, scoring, and etiquette—means you can step onto any court in the world and play with confidence.

So the next time you hear the ball crack against the front wall, you won’t just be reacting—you’ll know exactly what to do, where to stand, and how to keep the rally alive. And that’s when squash becomes what it’s truly meant to be: fast, fair, and fiercely fun.

Top 10 mistakes every squash beginner makes

Top 10 Beginner Mistakes in Squash and How to Avoid Them

Squash is fast, intense, and endlessly rewarding—but it can also feel overwhelming when you’re new. Many beginners jump on the court full of energy but quickly find themselves chasing the ball, hitting wildly, or losing points to simple errors. The good news? Most of these struggles come from a few common mistakes that can be fixed with awareness and practice.

Here are the top 10 beginner mistakes in squash—and how you can avoid them.

1) Standing in the Wrong Position

The mistake: Beginners often hang out at the back of the court or drift too close to the front wall, leaving huge gaps for opponents to exploit.

How to avoid it:

  • Always recover to the T-position (the middle where the lines meet).
  • From the T, you can reach any corner quickly.
  • Think: hit → recover → split-step → move.

2) Hitting Too Hard

The mistake: Many beginners swing with maximum power, thinking harder shots equal more points. Instead, the ball often rebounds into the middle, giving opponents easy chances.

How to avoid it:

  • Prioritize accuracy and length over power.
  • Use a smooth swing and aim for tight rails along the wall.
  • Remember: tight, controlled shots win rallies—not reckless power.

3) Ignoring the Side Walls

The mistake: New players avoid using the side walls, trying only to hit directly to the front wall. This makes their game predictable.

How to avoid it:

  • Practice cross-court drives that clip the side wall before reaching the front.
  • Use boasts (side wall → front wall shots) to drag opponents forward.
  • Side walls add variety and disrupt your opponent’s rhythm.

4) Poor Grip Technique

The mistake: Holding the racket like a tennis racquet—flat and tight—limits wrist movement and control.

How to avoid it:

  • Use the handshake grip, placing the “V” of your thumb and index along the racket’s edge.
  • Keep the grip relaxed; tighten only at impact.
  • A proper grip allows cleaner shots and smoother switches between forehand and backhand.

5) Not Clearing After Shots

The mistake: Beginners often admire their shot or freeze after hitting, blocking their opponent’s path. This causes interference and easy point losses.

How to avoid it:

  • After every shot, move back to the T.
  • Clear space quickly so your opponent has access to the ball.
  • If you’re in the way, call for a “let”—but aim to avoid these situations.

Top 7 Squash Courts for You in India

6) Neglecting Footwork

The mistake: Standing flat-footed or lunging late leads to rushed, off-balance shots.

How to avoid it:

  • Stay light on your toes and use a split-step as your opponent strikes.
  • Lunge with your leading leg, keeping your body balanced.
  • Practice “ghosting” drills—moving to corners without the ball—to build muscle memory.

7) Serving Without Purpose

The mistake: Beginners often just tap the ball in to start the rally, giving away the advantage of the serve.

How to avoid it:

  • Use a high lob serve that lands deep in the opposite back corner.
  • Occasionally, mix in body serves to jam your opponent.
  • Treat every serve as a chance to seize control of the rally.

8) Not Watching the Opponent

The mistake: Beginners follow only the ball, ignoring where their opponent is standing. This leads to poor shot choices.

How to avoid it:

  • After hitting, glance at your opponent’s position.
  • If they’re deep, try a drop; if they’re forward, drive it past them.
  • Awareness turns defense into attack.

9) Skipping Warm-Up and Cool-Down

The mistake: Rushing into play cold often results in poor timing—or worse, injuries. Beginners also neglect stretching afterwards.

How to avoid it:

  • Warm up with 5 minutes of solo drives and dynamic stretches.
  • After the game, stretch calves, hamstrings, quads, and shoulders.
  • A small habit that protects your body and improves performance.

10) Fearing the Drop Shot

The mistake: Many beginners avoid drops, thinking they’re too risky, or they play them poorly—too high, too hard, or from bad positions.

How to avoid it:

  • Use drops when you’re balanced and in front of your opponent.
  • Keep the swing compact, guiding the ball softly just above the tin.
  • Mix drops with deep drives to keep opponents guessing.

Bonus Mistake: Not Choosing the Right Ball

Squash balls come in different speeds:

  • Blue dot: Beginner, very bouncy.
  • Single yellow dot: Intermediate, standard club play.
  • Double yellow dot: Advanced, slower.

Using the wrong ball (too slow) makes rallies frustrating and short. Start with blue or single yellow until your rallies are consistent.

Final Rally

Squash is one of the most exciting sports you’ll ever play—but only if you avoid the traps that trip up beginners. Standing in the wrong spot, swinging too hard, ignoring the side walls, or skipping footwork will hold you back. The fix? Keep it simple: recover to the T, control your length, watch your opponent, and stay patient.

Every rally is a lesson, and every mistake is a chance to improve. With the right mindset, you’ll soon find yourself moving smarter, hitting cleaner, and—most importantly—winning more rallies.

So next time you step onto the court, remember: squash isn’t about hitting the hardest shot. It’s about controlling space, anticipating your opponent, and keeping your cool under pressure. Play smart, and the game will reward you.

How to Play Squash: A step-by-step guide for beginners

How to Play Squash: A Step-by-Step Beginner’s Guide

Four walls, one ball, endless action—welcome to squash.

Squash isn’t just a game—it’s a battle of reflexes, strategy, and endurance played inside four walls where the ball never seems to slow down. Ranked among the world’s healthiest sports for its mix of speed, agility, and cardio intensity, squash challenges both your body and your mind. But for newcomers, stepping onto the court can feel overwhelming: What’s with all the lines? How do you serve? And how do you keep up with a ball that seems to vanish into the corners?

This step-by-step beginner’s guide cuts through the confusion. Whether you’re picking up a racket for the first time or looking to turn casual rallies into real games, you’ll learn the basics—rules, equipment, strokes, movement, and strategies—to start playing squash with confidence.

1) Gear You Actually Need (and what to skip)

  • Racket: Start with a mid-weight frame (130–140g unstrung) and an even or slightly head-light balance.
  • Ball: Beginners should use a single yellow dot (or even blue); double-yellow is for advanced play and will feel dead.
  • Shoes: Indoor non-marking court shoes with good lateral support.
  • Eyewear: Mandatory for safety, especially against volleys and ricochets.
  • Overgrip: A tacky grip helps keep control as you sweat.

2) Know the Court and the Lines

  • Service boxes: Where serves begin.
  • Short line: Splits front from back.
  • Half-court line: Splits left from right at the back.
  • Tin: Lower metal strip on the front wall; below it is out.
  • Outline & service line: Ball above these is out.

Core rule: The ball must always hit the front wall before or after the side/back walls and bounce no more than once.

3) How Scoring Works

  • Point-a-rally (PAR) to 11, win by 2.
  • Matches are best of 3 or 5 games.
  • Either player can score—no need to be serving.

4) Serving and Receiving

Serve checklist:

  1. One foot in the service box.
  2. Hit above the service line on the front wall.
  3. Land in the opposite back quarter.
  4. Alternate boxes after winning points.

Receiving tip: Aim to return deep and seize the T-position (center court).

5) Safety, Interference, Let & Stroke

  • Let: Rally replayed if obstructed but not decisive.
  • Stroke: Point to the striker if blocked from a direct winning shot.
  • Golden rule: Always clear space after hitting your shot.

6) The Beginner-Proof Grip

  • Hold it like a handshake.
  • V-shape of thumb/index on the back edge of the racket.
  • Relax your grip; tighten only on contact.

7) Four Core Shots to Learn

  1. Straight Drive (rail): Deep and tight along the side wall.
  2. Crosscourt Drive: Forces opponent off the T.
  3. Drop Shot: Soft, low shot close to the tin.
  4. Boast: Use the side wall to bring the ball forward when stuck.

8) Movement & Footwork

  • Control the T-position.
  • Use a split step as your opponent hits.
  • Lunge smartly and recover quickly.
  • Keep movements short, sharp, and efficient.

9) A Simple Beginner Game Plan

  • Serve high lobs, preferably to the backhand side.
  • Keep shots deep with rails.
  • Volley whenever possible.
  • Use drops sparingly—only when balanced.
  • Boast from defensive positions.

10) Five Starter Drills

  1. Solo straight drives – 100 per side.
  2. Figure-8 volleys – build touch & timing.
  3. Ghosting – shadow footwork to all corners.
  4. Drive–boast routine – partner drill for control.
  5. Serve & return ladder – practice starting rallies.

11) One-Week Beginner Plan

  • Day 1: Rules + solo drives.
  • Day 2: Footwork + drive–boast.
  • Day 3: Short games to 7.
  • Day 4: Rest/mobility.
  • Day 5: Serve & return + conditioned play.
  • Day 6: Full match.
  • Day 7: Light solo practice + stretch.

12) Warm-Up, Cool-Down & Prevention

  • Warm-up (5–8 mins): Skipping, dynamic stretches, light ghosting.
  • Cool-down: Light jog + stretches for calves, quads, hamstrings, and shoulders.
  • Hydrate & refuel with carbs + protein after play.

How to Play Squash: A beginner's guide

14) Court Etiquette Every Player Should Follow

  • Arrive on time with clean shoes.
  • Call “let” clearly and apologize if interfering.
  • Retrieve balls promptly.
  • Wipe sweat patches to prevent slips.

15) Quick FAQs on Squash

1. Is squash hard to learn for beginners?

Not at all. While squash is fast-paced, the rules and basics are simple to pick up. Most beginners can start rallying within their first session. The challenge—and fun—comes from improving your control, movement, and strategy over time.

2. How often should I play squash to improve?

Two sessions per week (one practice, one match) is a solid start. Consistency matters more than volume—regular practice helps you build muscle memory, improve fitness, and develop court awareness without burning out.

3. What’s the difference between squash balls (blue, red, yellow dots)?

  • Blue dot: Fastest, bounciest, ideal for beginners.

  • Red dot: Slightly slower, for improving players.

  • Single yellow dot: Standard club ball, for intermediate players.

  • Double yellow dot: Slowest, for advanced and pro play.
    Choose a livelier ball (blue or red) until you can generate enough pace yourself.

4. Can I play squash if I’ve never played another racket sport?

Yes! Unlike tennis or badminton, squash doesn’t require prior racket experience. The skills—like grip, footwork, and shot-making—are unique, so everyone starts fresh. In fact, complete beginners often learn faster because they don’t carry over habits from other sports.

5. What’s the best way to win points as a beginner?

Focus on three basics:

  1. Serve high and deep (especially to the backhand side).

  2. Hit straight drives tight along the walls.

  3. Always recover to the T after your shot.
    Even without fancy shots, controlling depth and position will win you more rallies than trying to hit risky winners.

Final Rally

Squash may look intimidating at first, but once you understand the court, the rules, and a few key shots, the game quickly turns into an addictive mix of speed, skill, and strategy. Every rally teaches you something new—about timing, positioning, and even how to push through fatigue.

Remember the essentials: serve smart, hit deep, recover to the T, and keep rallies alive with controlled shots. As you practice, the chaos of chasing the ball around four walls transforms into rhythm, flow, and eventually, confidence.

So grab your racket, find a court, and step into the game. Because once you start, you’ll understand why squash has been called “the sport for life”—fast, social, endlessly challenging, and always worth that final sprint to the ball.

Home
Shop
Wishlist0
Back to Top

Search For Products

Product has been added to your cart
Compare (0)